
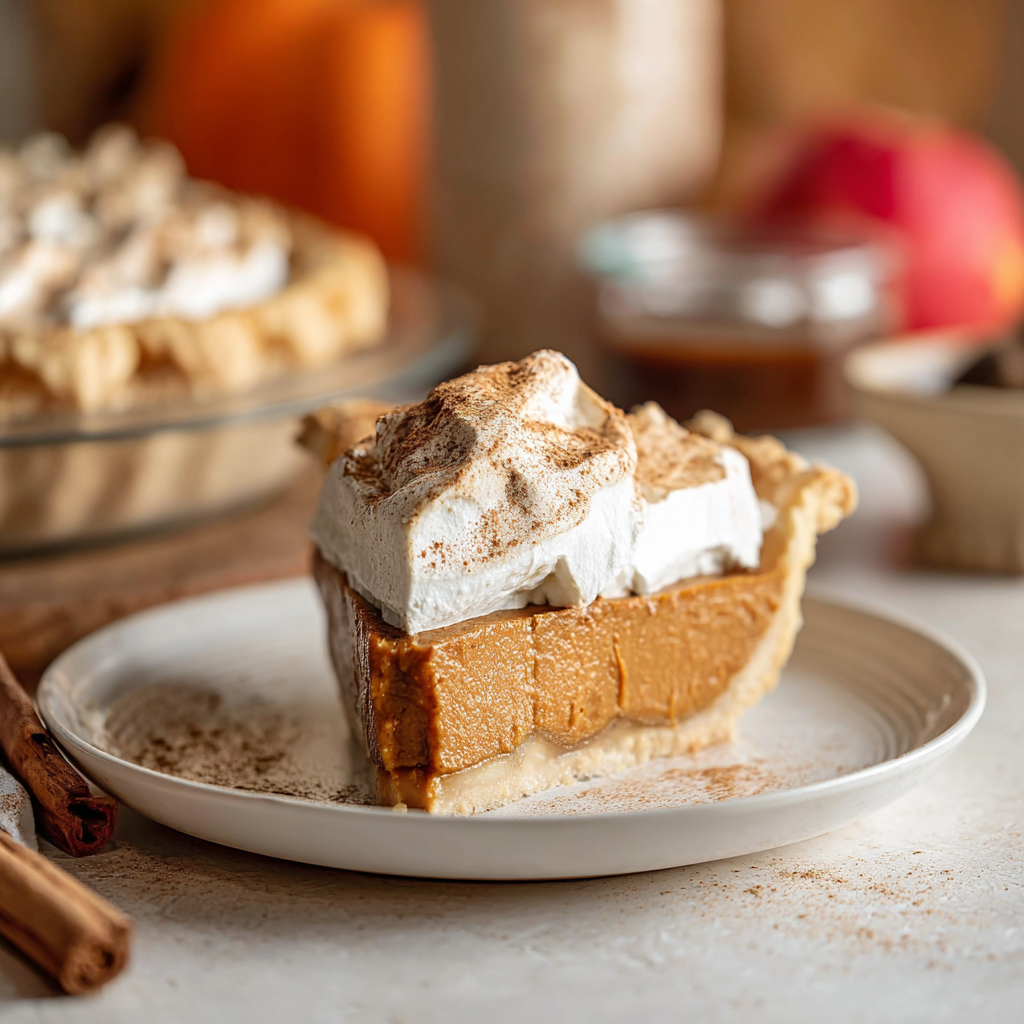
Apple Butter Pie with Cinnamon Whipped Cream

A silky, custardy apple butter filling nestled in a flaky homemade crust and finished with cinnamon-scented whipped cream—comforting, nostalgic, and perfect for sharing.

This apple butter pie has been a surprise showstopper at more than one family gathering. I first baked it on an unexpected autumn evening when the pantry offered nothing but a jar of apple butter and a craving for something cozy. The result: a custard-like filling with deep apple spice layered over a crisp, butter-rich crust that cuts clean and holds its shape. Every bite is smooth, gently spiced, and brightened by a swirl of extra apple butter and a cloud of cinnamon whipped cream. It quickly replaced a more labor-intensive autumn tart in my rotation because it manages to feel both rustic and refined.
I love this preparation because it highlights store-bought apple butter without making the dessert taste processed. Using sweetened condensed milk gives the filling a luxuriously creamy texture while the eggs set it into a silky custard that slices beautifully. The crust is worth your attention—cold butter, minimal handling, and a brief chill deliver those flaky layers that make a pie feel special. Serve it warm or chilled; both are excellent. For holiday dinners, I often double the whipped cream and add an extra jar of apple butter on the side for guests who like a more intense apple flavor.
Why You'll Love This Recipe
- The filling is ready in about 15 minutes of active mixing and bakes into a custard-like finish that holds clean slices—perfect for entertaining and plated desserts.
- Uses pantry staples and one jar of apple butter as the main flavor—no peeling or chopping apples required, which saves time.
- Crust is a classic butter paste crust that you can make ahead; the second disc freezes well for future pies.
- Make-ahead friendly: the pie can be cooled and refrigerated overnight and finished with whipped cream just before serving.
- Versatile presentation—serve warm with a scoop of vanilla ice cream or chilled with the cinnamon whipped cream for a lighter finish.
- Great for dietary tweaks: swap to a store-bought gluten-free crust or use dairy-free whipped cream alternatives to accommodate needs.
When I first served this at a weekend dinner, my usually reserved neighbor asked for a second slice before anyone else had finished theirs. The combination of the deep apple spice and the mellow condensed milk custard felt simultaneously nostalgic and a little unexpected—guests often comment that it tastes like a cross between apple pie and a silky custard. That reaction keeps me making it year after year.
Ingredients
- Pie crust: 3 1/4 cups all-purpose flour (about 390 g) — choose a reliable brand like King Arthur for consistent protein and predictable rolling behavior. The flour gives structure without weighing the crust down.
- Butter: 1 cup plus 6 tablespoons cold unsalted butter (about 11 oz or 311 g) — use real butter (not spread) for the flavor and flakiness; European-style butter with higher fat will yield extra tenderness.
- Salt: 1 teaspoon kosher salt — balances sweetness and enhances the butter flavor in the dough.
- Ice water: 2/3 cup plus a tablespoon very cold water — keep it icy to prevent the butter from warming while you work the dough.
- Apple butter: 1 1/2 cups (about 16 fl oz / 482 g) — choose a thick, spiced variety; the pie depends on its concentrated apple and spice notes. Reserve a few tablespoons for an extra swirl on top.
- Eggs: 3 large eggs, room temperature — they set the custard and add richness and structure.
- Brown sugar: 1/4 cup dark brown sugar (about 50 g) — deep molasses flavor complements the apple butter.
- Flour (for filling): 1 tablespoon all-purpose flour — a small binder that helps stabilize the filling.
- Vanilla: 1 teaspoon vanilla paste or extract — enhances aroma and rounds the flavors.
- Sweetened condensed milk: 14 oz can — creates a silky, sweet custard base; scrape the can clean for maximum creaminess.
- Cinnamon whipped cream: 1 cup heavy whipping cream (240 ml), 2 tablespoons powdered sugar, 1 teaspoon ground cinnamon, and 1 teaspoon vanilla — whipped to soft-stiff peaks for a light, spiced finish.
Instructions
Prepare the dough: Cut the cold butter into roughly 1/2-inch cubes and briefly chill them in the freezer (about 15 minutes) while you measure. Pulse the flour and salt in a food processor to combine, then add the butter and pulse until pieces are the size of peas. With the processor running, drizzle in 2/3 cup ice water and stop as soon as the dough holds together in shaggy clumps—leave one tablespoon if you need to add it at the end. The dough should feel like wet sand and press together without being sticky. Chill and roll: Divide the dough into two even portions, flatten into 1-inch discs, wrap tightly, and refrigerate for 1–2 hours until firm. Remove one disc 15 minutes before rolling to take off the chill; lightly flour your surface and roll to about 1/8-inch thickness, leaving a 2-inch overhang for trimming. Fit into a 9-inch pie dish, trim to a 1-inch overhang, fold under, and crimp the edge. Par-bake the shell: Freeze the fitted crust 15 minutes, then dock with a fork all over. Line the pie shell with parchment and fill with pie weights or dried beans. Bake at 375°F (190°C) for 15 minutes, remove weights, then bake another 5 minutes until lightly set. Transfer to a rack while you prepare the filling. Mix the filling: Reduce oven temperature to 325°F (163°C). In a large bowl, whisk together 1 1/2 cups apple butter, 3 room-temperature eggs, 1/4 cup dark brown sugar, 1 tablespoon flour, and 1 teaspoon vanilla until smooth. Pour in the 14 oz sweetened condensed milk and whisk until fully combined into a uniform batter. Bake the pie: Pour the filling into the par-baked crust and bake in the center of the oven for 30 minutes. Move the pie to the lower third of the oven and continue baking 10–15 minutes more until the center is set but still slightly jiggly—avoid a sloshy center. Cool on a wire rack for about 3 hours (or refrigerate to speed cooling). Whip the cream: In a chilled bowl, whip 1 cup heavy cream with 2 tablespoons powdered sugar, 1 teaspoon ground cinnamon, and 1 teaspoon vanilla on high until soft-stiff peaks form—about 1–2 minutes. Taste and adjust sweetness as desired. Finish and serve: Spread the cinnamon whipped cream over the cooled pie and dollop reserved apple butter, swirling lightly into the cream. For neat slices, use a sharp knife wiped clean between cuts. Serve slightly chilled or at room temperature.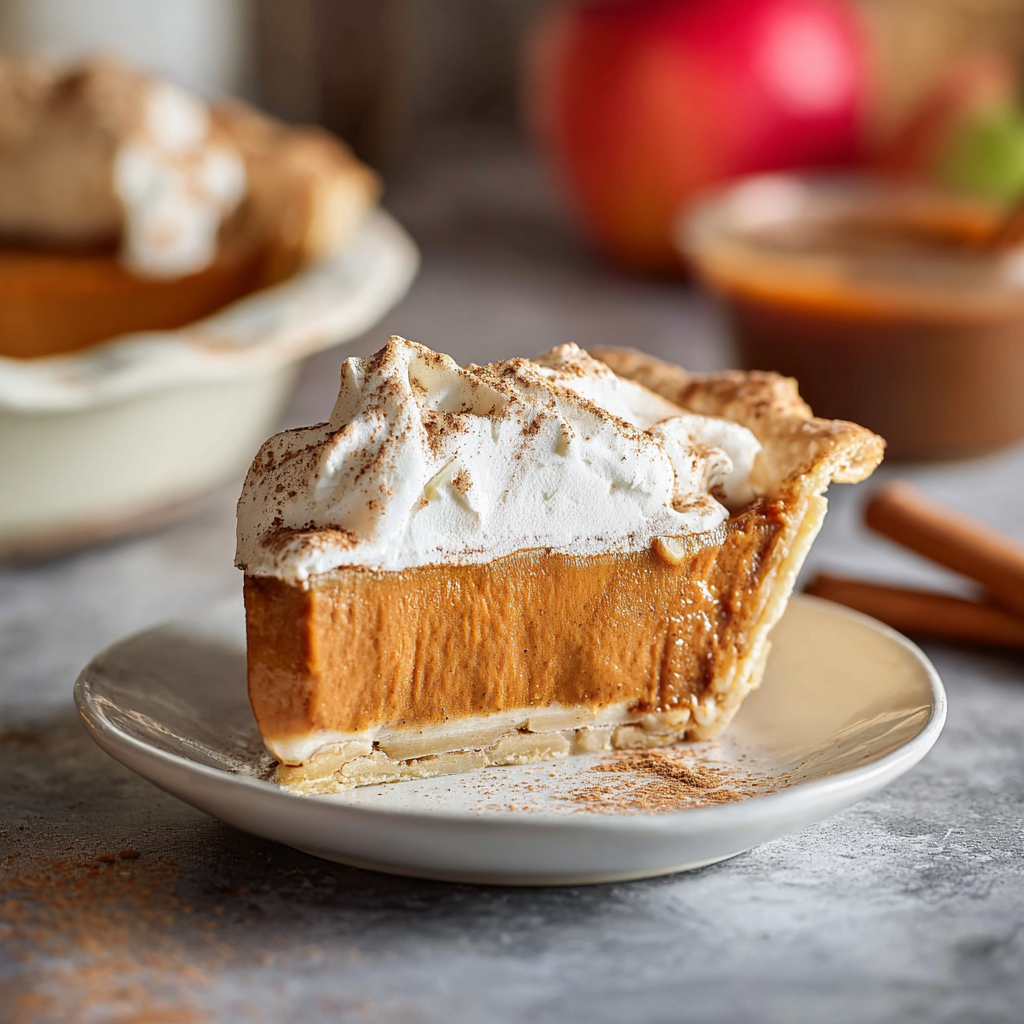
You Must Know
- This dessert is rich and best served in moderate slices—one 9-inch pie yields about 8 servings.
- Refrigerate leftovers; the pie keeps well for up to 4 days in the fridge. Freeze the unfilled crust disc for up to 3 months.
- High in both sugar and dairy—each slice is indulgent, so consider pairing with a simple green salad to balance a meal.
- Freezes well before adding whipped cream—wrap tightly and freeze up to 2 months; thaw overnight in the refrigerator.
- The filling sets to a custard texture thanks to the eggs and condensed milk; slight jiggle at the center after baking is ideal.
One of my favorite aspects is how forgiving the filling is: small timing differences in the oven still produce a silky result. The pie is consistently a crowd-pleaser at potlucks—people compliment the clean slices and the cinnamon whipped cream always gets second helpings. It’s one of those dishes that’s elevated by attention to simple details: a properly chilled crust, room-temperature eggs, and freshly whipped cream.
Storage Tips
Store the pie covered in the refrigerator for up to 4 days; keep whipped cream topping fresh by adding it only before serving when possible. For longer storage, freeze the baked pie without the whipped topping: double-wrap in plastic wrap and aluminum foil and freeze for up to 2 months. Thaw overnight in the fridge and refresh the surface with freshly whipped cinnamon cream. Avoid room-temperature storage for more than two hours because of the dairy and egg content.
Ingredient Substitutions
If you need to adapt, you can use a store-bought pie shell for convenience—bake according to package directions before filling. For a dairy-free version, use coconut condensed milk and a dairy-free butter substitute for the crust, and whip coconut cream flavored with cinnamon. For less sweetness, choose a less-sweet apple butter or reduce the powdered sugar in the topping; expect a slightly less glossy filling if you reduce condensed milk.
Serving Suggestions
Serve each slice with an extra dollop of apple butter and a sprinkle of flaky sea salt for contrast, or a small scoop of vanilla bean ice cream if serving warm. Garnish with thin apple slices or a light dusting of cinnamon. This dish pairs well with black coffee or a lightly spiced tea, and its homey character makes it ideal for weekend brunches, holiday dessert tables, or an after-dinner treat with friends.
Cultural Background
Apple butter itself dates back to colonial American and European traditions where cooked-down apples provided a shelf-stable concentrate for months. This preparation reimagines those deep, concentrated apple flavors into a custardy pie that nods to both classic apple pies and custard tarts. It’s part comfort-food heritage and part modern pantry cooking—using preserved apple butter to shortcut the labor of peeling and cooking fresh apples while preserving honest, spiced apple flavor.
Seasonal Adaptations
In fall, amplify the spices by stirring in 1/4 teaspoon nutmeg or allspice into the filling. For winter holidays, fold in 1 tablespoon of bourbon into the filling for warmth. In spring or summer, lighten the top by substituting whipped cream with lightly sweetened crème fraîche for tang and freshness. Small swaps let this dessert sit comfortably on menus year-round.
Meal Prep Tips
Make the dough and freeze one disc for another pie; the other disc can be used immediately. You can also assemble and bake the pie a day ahead—allow it to cool, then store refrigerated and add whipped cream just before serving. For entertaining, bake two pies in advance and finish one with whipped cream and decorative apple butter swirls just before guests arrive.
Warm, fragrant, and elegant in its simplicity, this pie is one I return to whenever I want a dessert that feels like a hug. Give it a try the next time you want to transform a jar of apple butter into something that will prompt repeat requests.
Pro Tips
Use cold butter and minimal water when making the dough to maximize flakiness.
Room-temperature eggs incorporate more evenly into the filling; cold eggs can cause the batter to seize.
Let the pie cool fully before topping with whipped cream to prevent the cream from melting.
This nourishing apple butter pie with cinnamon whipped cream recipe is sure to be a staple in your kitchen. Enjoy every moist, high protein slice — it is perfect for breakfast or as a wholesome snack any time.
FAQs about Recipes
How long does the pie keep?
Yes. The pie keeps well in the refrigerator for up to 4 days. Store it covered and add whipped cream just before serving if possible.
Can I freeze the pie?
Freeze the baked pie without the whipped cream, double-wrapped, for up to 2 months. Thaw overnight in the fridge and top with freshly whipped cream.
Tags
Apple Butter Pie with Cinnamon Whipped Cream
This Apple Butter Pie with Cinnamon Whipped Cream recipe makes perfectly juicy, tender, and flavorful steak every time! Serve with potatoes and a side salad for an unforgettable dinner in under 30 minutes.
Ingredients
Pie Crust
Filling
Cinnamon Whipped Cream
Instructions
Make the crust
Pulse flour and salt in a food processor, add cubed cold butter and pulse until pea-sized. Drizzle in 2/3 cup ice water until dough forms shaggy clumps. Divide into two discs, wrap, and chill 1–2 hours.
Roll and fit
Roll chilled dough to 1/8-inch thickness and fit into a 9-inch pie dish with a 1-inch trimmed overhang. Fold under and crimp the edges, then freeze 15 minutes before par-baking.
Par-bake the shell
Dock the crust, line with parchment and pie weights, and bake at 375°F for 15 minutes. Remove weights and bake another 5 minutes until lightly set. Cool while making the filling.
Prepare the filling
Preheat oven to 325°F. Whisk apple butter, eggs, brown sugar, flour, and vanilla until smooth. Add sweetened condensed milk and whisk to a uniform batter.
Bake the pie
Pour filling into par-baked shell and bake 30 minutes in the center rack. Move to the lower third and bake another 10–15 minutes until center is set but slightly jiggly. Cool on a rack for about 3 hours.
Whip and finish
Whip heavy cream with powdered sugar, cinnamon, and vanilla until soft-stiff peaks form. Spread over cooled pie, dollop reserved apple butter, swirl, and slice with a clean knife between cuts.
Last Step: Please leave a rating and comment letting us know how you liked this recipe! This helps our business to thrive and continue providing free, high-quality recipes for you.
Nutrition
Did You Make This?
Leave a comment & rating below or tag
@mrsrecipe on social media!
Categories:
You might also like...

Best Chicken Fried Steak
A crispy, tender chicken fried steak with a rich sausage cream gravy — classic comfort food perfect for family dinners and weekend indulgence.

Fluffy Japanese Soufflé Pancakes
Tall, cloudlike pancakes with a delicate eggy interior and golden exterior, perfect for a celebratory breakfast or a relaxed weekend treat.

Creamy Chicken Stuffed Peppers
Bell peppers filled with a rich, creamy chicken and cheese mixture—simple to assemble, family-friendly, and perfect for weeknight dinners or make-ahead meals.
Did You Make This?
Leave a comment & rating below or tag @mrsrecipe on social media!
Rate This Recipe
Share This Recipe
Enjoyed this recipe? Share it with friends and family, and don't forget to leave a review!
Comments (1)
This recipe looks amazing! Can't wait to try it.
Comments are stored locally in your browser. Server comments are displayed alongside your local comments.
Hi, I'm Clara!
What's Popular

Get My 30-Minute Meals email series!
Quick and easy dinner ideas delivered to your inbox.