
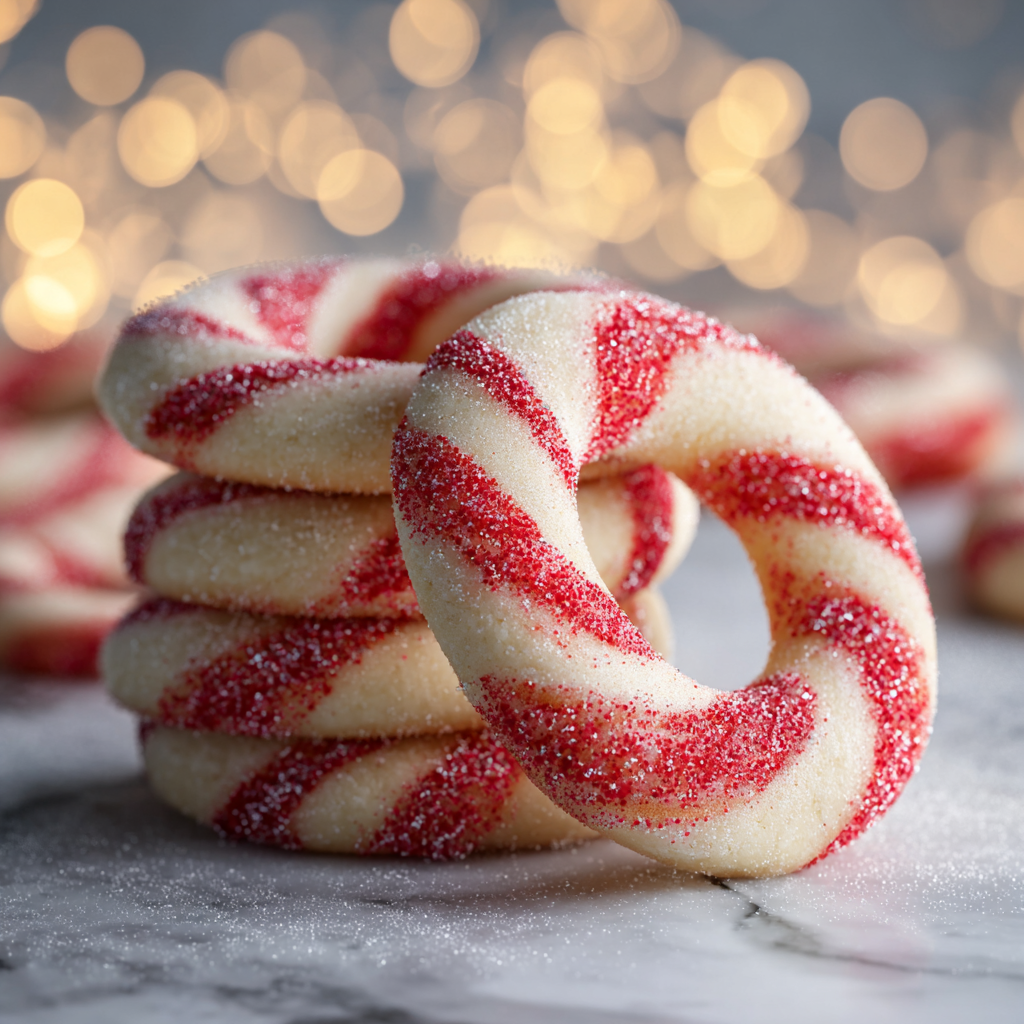
Candy Cane Cookies

Buttery, tender cookies twisted into festive candy cane shapes with a hint of peppermint — a holiday tradition that disappears first from the cookie plate.

This recipe for Candy Cane Cookies has been part of our holiday baking rotation for as long as I can remember. I first discovered the technique of twisting two colors of dough together on a frosty December afternoon while trying to recreate a memory of store-bought cane cookies that my grandmother loved. What started as an experiment with pantry staples and a splash of peppermint extract has become the cookie everyone reaches for first at our family gatherings. The texture is tender and slightly crumbly at the edges with a melt-in-your-mouth buttery center, while the peppermint adds a bright, festive lift that pairs wonderfully with a cup of cocoa or black tea.
I love how simple ingredients come together to create something that looks elaborate. These cookies feel special — the little red stripes make each piece look hand-crafted and festive — but they’re fast to make and forgiving for all skill levels. Rolling and twisting the dough is almost meditative and my kids get a kick out of shaping their own canes. Every year, the first tray I pull from the oven always gets oohs and aahs and, more importantly, immediate snatches. They’re perfect for cookie swaps, gift tins, or a cozy evening at home.
Why You'll Love This Recipe
- Ready with pantry staples: uses basic ingredients like butter, flour, powdered sugar, and a little peppermint — no complicated add-ins or chilled specialty dough required.
- Quick to mix and bake: from measuring to oven in about 25 minutes; individual bake times are 8 to 10 minutes so batches move quickly.
- Make-ahead friendly: dough can be colored and shaped ahead, then frozen or refrigerated for later baking, making holiday prep much easier.
- Kid-friendly activity: shaping and twisting the ropes into canes is a fun hands-on task for little helpers and makes great family memories.
- Beautiful, gift-ready presentation: the red-and-white twist looks professional without fuss, perfect for tins and cookie plates.
- Customizable: use more or less peppermint, swap extracts, or dip the tips in chocolate for a different finish.
Personally, the best discovery was that a single drop of gel color gives a lovely vintage stripe without bleeding into the white dough. My sister once made an entire tray in one afternoon and delivered them warm — the neighbors called them 'the smell of Christmas' and came by for a cup of coffee and two cookies each. That quick, warm-sharing moment is why I keep this recipe on repeat.
Ingredients
- Unsalted butter (1 cup): Use high-quality European-style butter if you can for extra richness and a creamier mouthfeel; let it soften to room temperature for creamy creaming.
- Powdered sugar (1 cup): Also called confectioners' sugar; it dissolves smoothly into the butter for a fine, tender crumb. sift if you like an even silkier texture.
- Large egg (1): Room temperature and beaten into the batter for added structure and a glossy dough; cold eggs can cause the dough to seize.
- Vanilla extract (1 teaspoon): Pure vanilla extract gives a warm background note that balances the peppermint.
- Peppermint extract (1/2 teaspoon): Use sparingly — peppermint is potent. Start with half a teaspoon and taste raw dough if you want it stronger.
- All-purpose flour (2 1/2 cups): Spoon and level into cups for accuracy. This amount yields tender cookies that hold shape when twisted.
- Salt (1/2 teaspoon): Balances the sweetness and enhances the butter flavor; use fine salt so it blends evenly.
- Red gel food coloring: A little goes a long way; gel coloring provides vivid stripes without thinning the dough the way liquid coloring can.
Instructions
Preheat and prepare pans: Preheat your oven to 375°F. Line baking sheets with parchment paper or silicone baking mats to ensure even baking and easy release. Position racks in the center and upper third if doing two trays at once. Cream butter and sugar: With a stand mixer fitted with the paddle or with a hand mixer, beat the softened butter and powdered sugar on medium-high for 3 to 4 minutes until pale and fluffy. Scrape down the bowl once or twice to ensure even aeration — this step traps air for a lighter finished texture. Add egg and extracts: Beat in the room-temperature egg, vanilla, and peppermint extract on low speed until fully incorporated. The mixture should be smooth and glossy; if it looks curdled, continue mixing briefly until it comes together. Mix dry ingredients: In a separate bowl, whisk the flour and salt. Add the dry mix to the butter mixture gradually on low speed until a soft, non-sticky dough forms. Stop mixing as soon as the flour is absorbed to avoid developing excess gluten, which can make cookies tough. Divide and color: Divide the dough into two equal portions. Add a very small amount of red gel coloring to one half and knead briefly until evenly colored. Use a toothpick to add coloring sparingly — gel is concentrated and a little makes the difference. Keep the white portion untouched. Shape canes: Roll 1 teaspoon portions of each color into 4-inch ropes on a lightly floured surface. Place one red rope and one white rope side by side, press gently to adhere, then twist together several times and bend the top into a cane shape. Repeat, spacing each cookie 1 inch apart on prepared sheets. Bake and cool: Bake 8 to 10 minutes, until the bottoms are just beginning to show a light golden hue; the tops should remain pale. Let cookies cool on the pan for 5 minutes to set, then transfer to a wire rack to cool completely.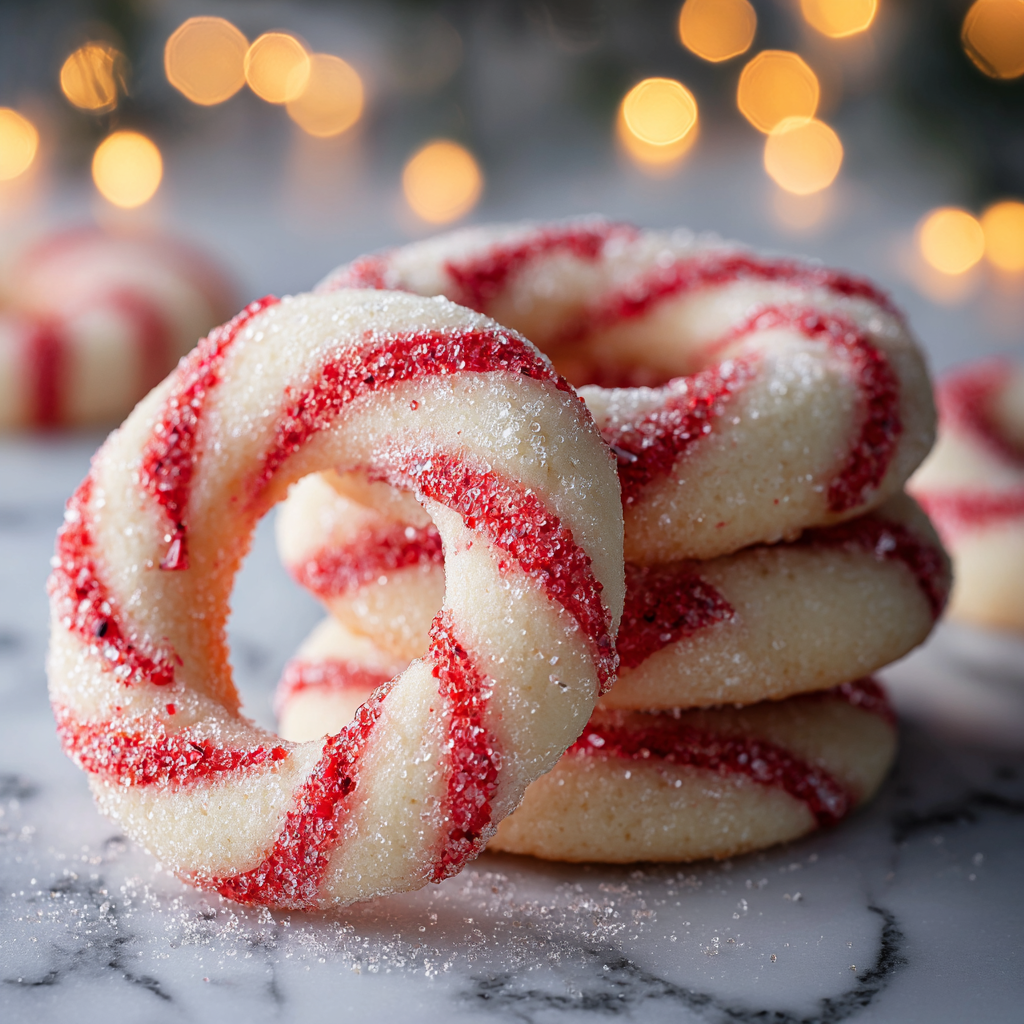
You Must Know
- Storage: Baked cookies keep well at room temperature in an airtight container for up to 5 days and freeze beautifully for 3 months.
- Freezing dough: Shape canes and flash-freeze on a tray, then store in a zip-top bag for later baking — add 1 to 2 extra minutes to baking time from frozen.
- Nutritional note: Small cookies are about 120 calories each depending on size and butter brand; they are not low-carb or dairy-free.
- Make-ahead tip: Dough can be mixed the day before and chilled; let it rest at room temperature 10 to 15 minutes before shaping if too firm.
My favorite aspect is the ritual of twisting the ropes. Once, while shaping with my niece, she insisted each cane have a unique curl; a neighbor saw the batch through the kitchen window and knocked asking for one — she insisted they were the 'friendliest cookies' she'd ever met. Small rituals like that are the true joy of baking.
Storage Tips
Store completely cooled cookies in an airtight container layered with parchment to prevent sticking. At room temperature, they remain fresh for up to five days; for longer storage, freeze in a rigid container or heavy-duty freezer bag for up to three months. To thaw, transfer frozen cookies to the refrigerator overnight or to the counter for a few hours. If you freeze shaped raw dough, place pieces on a lined tray to freeze individually, then transfer to bags; bake from frozen and add 1 to 2 minutes to the bake time, watching for the edges to set.
Ingredient Substitutions
If you prefer a slightly lighter texture, substitute half of the all-purpose flour with cake flour, keeping total volume equal. For a dairy-free version use a plant-based stick butter that measures like butter; expect a slight change in flavor and a softer texture. If peppermint extract is unavailable, a drop of pure peppermint oil diluted in a bit of vanilla works (use far less — peppermint oil is strong). To color naturally, a small amount of freeze-dried strawberry powder can give soft pink stripes rather than bright red.
Serving Suggestions
These are lovely alongside hot cocoa, mulled cider, or a robust black tea. Arrange in a festive tin with parchment and ribbon for gifts, or stack on a dessert board with chocolate-dipped pretzels and ginger snaps. Garnish with a light dusting of powdered sugar for presentation, or dip the tips in melted dark or white chocolate and sprinkle with crushed peppermint for an elegant finish.
Cultural Background
The candy cane as a symbol of the holiday season has roots in 17th-century Europe, evolving from straight white sticks to the red-and-white striped canes we recognize today. These cookies are a playful riff on that tradition, translating the visual language of candy into buttery, tender bites. Twisting two dough colors to mimic candy stripes is a modern, home-kitchen interpretation that combines the aesthetics of confectionery with classic shortbread-like techniques.
Seasonal Adaptations
In summer, swap peppermint for vanilla and dye one rope pastel pink for a softer celebration cookie. For Valentine’s Day, use strawberry extract and pink dye; for a winter gathering, fold in a teaspoon of finely grated orange zest to the white dough for a bright citrus counterpoint. Around Christmas, consider adding a pinch of ground ginger to the red dough for warmth, or dust finished cookies with shimmering edible glitter for parties.
Meal Prep Tips
Make dough up to 48 hours ahead and store tightly covered in the refrigerator. Shape and freeze extra batches on a tray, then bag them labeled with the date. For weekday cookie gifts, bake one tray after dinner, cool, and package the following morning. Use rigid containers to prevent crushed shapes when storing in the freezer; reheating briefly (10 to 15 seconds) in a microwave on low can refresh a chilled cookie's softness before serving.
These candy cane sweets are simple, bright, and full of holiday cheer — a small project that yields generous rewards in smiles and shared moments. Try a batch this season and make the shaping part of your family tradition; you may find, as I did, that the perfect twist is less about precision and more about the company you keep while baking.
Pro Tips
Use gel food coloring to avoid adding liquid and changing dough consistency; add sparingly with a toothpick.
If dough is too soft to shape, chill it in the refrigerator for 10 to 20 minutes until firm but pliable.
Roll ropes on a lightly floured surface using a pastry scraper to lift and rotate as you work to keep the ropes even.
Bake one sheet at a time if your oven browns unevenly; rotate sheets between racks halfway through if baking two at once.
This nourishing candy cane cookies recipe is sure to be a staple in your kitchen. Enjoy every moist, high protein slice — it is perfect for breakfast or as a wholesome snack any time.
FAQs about Recipes
Can I freeze the unbaked shaped cookies?
Yes — shaped raw dough can be frozen on a tray and transferred to a bag for up to 3 months. Bake from frozen, adding 1 to 2 minutes to the baking time.
What type of butter is best?
Use one stick (1 cup) of unsalted butter softened to room temperature for the creaming step. European-style butters give a richer flavor but are optional.
Tags
Candy Cane Cookies
This Candy Cane Cookies recipe makes perfectly juicy, tender, and flavorful steak every time! Serve with potatoes and a side salad for an unforgettable dinner in under 30 minutes.
Ingredients
Dough
Instructions
Preheat and prepare pans
Preheat oven to 375°F (190°C). Line baking sheets with parchment paper or silicone mats for even baking and easy removal.
Cream butter and sugar
Beat softened butter and powdered sugar for 3 to 4 minutes until pale and fluffy, scraping the bowl once for even aeration.
Add egg and extracts
Beat in the room-temperature egg, vanilla, and peppermint extract until smooth and fully incorporated.
Mix dry ingredients
Whisk flour and salt, then add gradually to the wet ingredients on low speed. Mix until a soft, non-sticky dough forms—do not overmix.
Divide and color
Split dough in half. Add a small amount of red gel coloring to one half and knead until evenly colored. Adjust color sparingly.
Shape canes
Roll 1 teaspoon portions of each color into 4-inch ropes. Place ropes side by side, press lightly, twist, and bend the top into a cane shape. Arrange on prepared sheets.
Bake and cool
Bake 8 to 10 minutes until bottoms are lightly golden. Cool on the pan for 5 minutes, then transfer to a wire rack to cool completely.
Last Step: Please leave a rating and comment letting us know how you liked this recipe! This helps our business to thrive and continue providing free, high-quality recipes for you.
Nutrition
Did You Make This?
Leave a comment & rating below or tag
@mrsrecipe on social media!
Categories:
You might also like...

Best Chicken Fried Steak
A crispy, tender chicken fried steak with a rich sausage cream gravy — classic comfort food perfect for family dinners and weekend indulgence.

Fluffy Japanese Soufflé Pancakes
Tall, cloudlike pancakes with a delicate eggy interior and golden exterior, perfect for a celebratory breakfast or a relaxed weekend treat.

Creamy Chicken Stuffed Peppers
Bell peppers filled with a rich, creamy chicken and cheese mixture—simple to assemble, family-friendly, and perfect for weeknight dinners or make-ahead meals.
Did You Make This?
Leave a comment & rating below or tag @mrsrecipe on social media!
Rate This Recipe
Share This Recipe
Enjoyed this recipe? Share it with friends and family, and don't forget to leave a review!
Comments (1)
This recipe looks amazing! Can't wait to try it.
Comments are stored locally in your browser. Server comments are displayed alongside your local comments.
Hi, I'm Clara!
What's Popular

Get My 30-Minute Meals email series!
Quick and easy dinner ideas delivered to your inbox.