>>
30-MINUTE MEALS! Get the email series now →


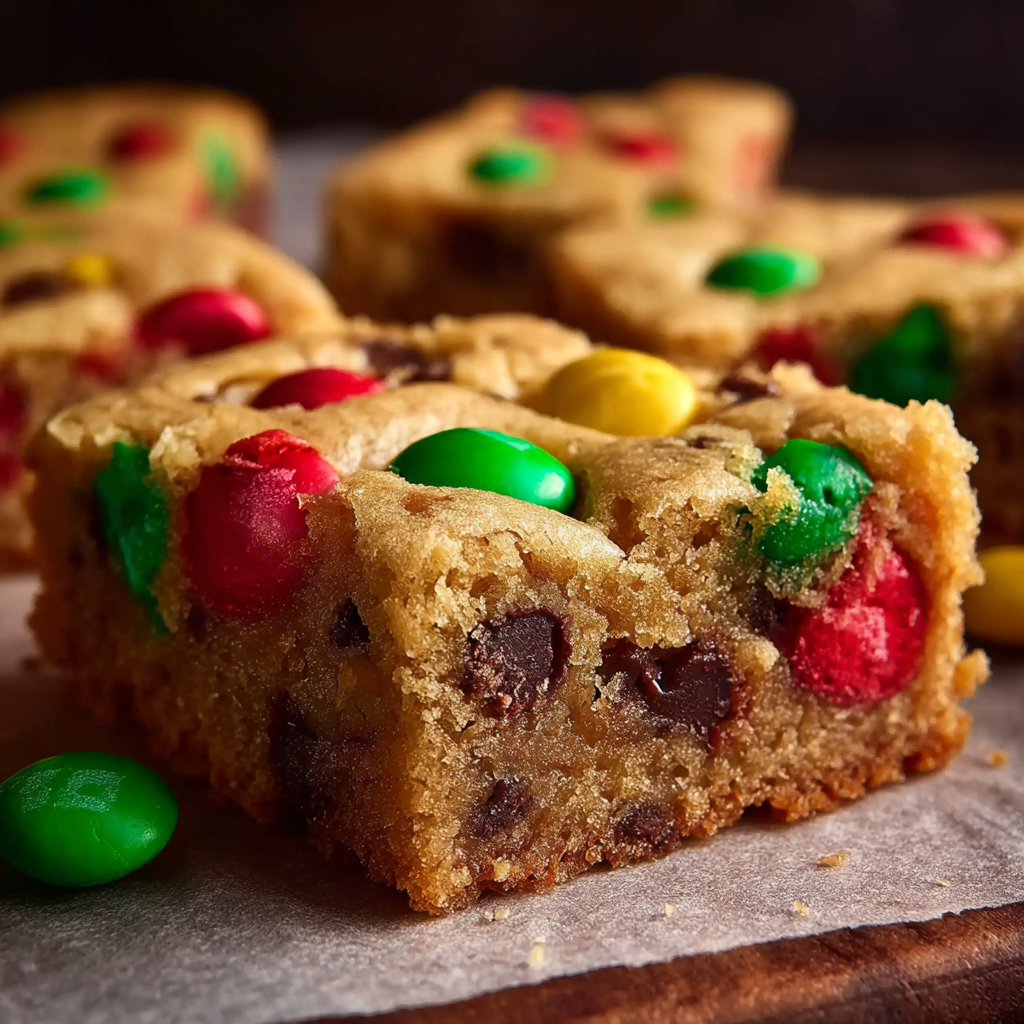
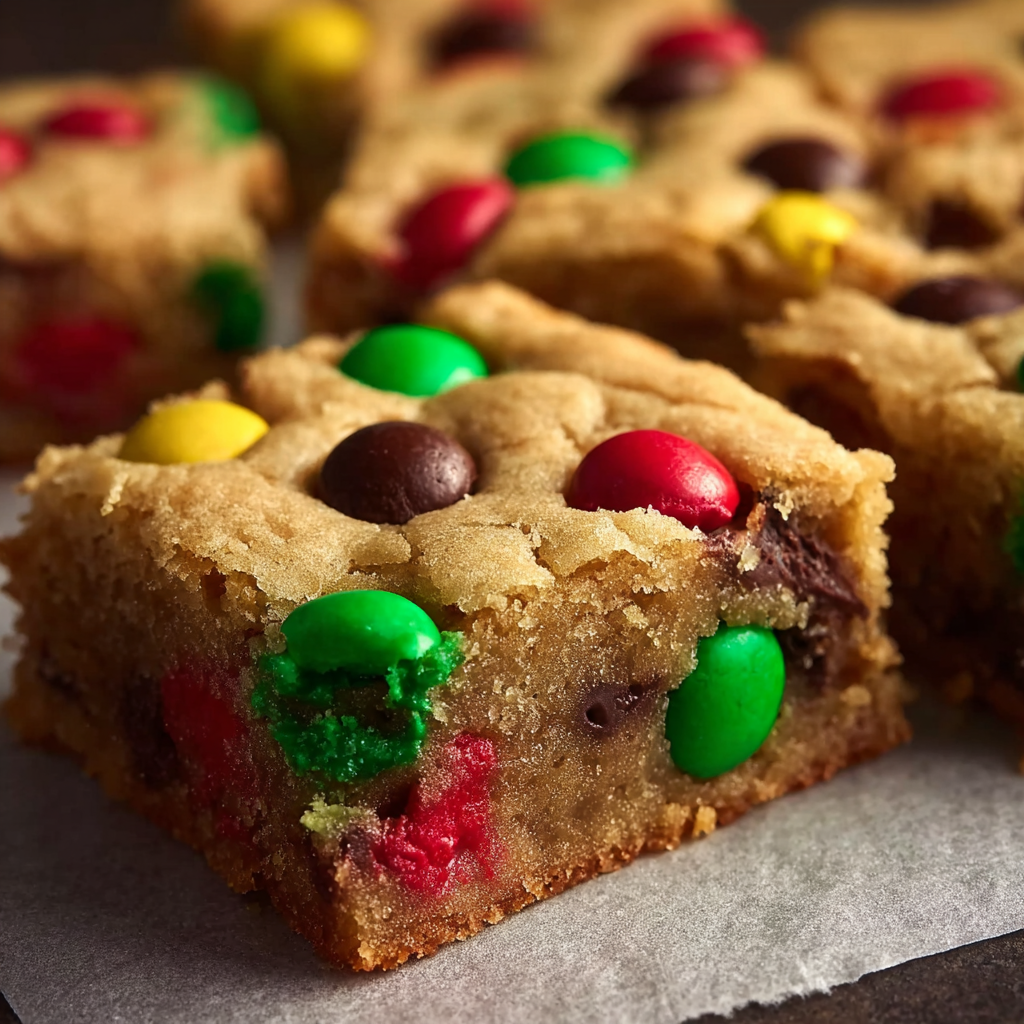
Soft, buttery cookie bars studded with chocolate chips and festive red, green, and white M&Ms — an easy holiday traybake that’s perfect for gifting and parties.

This holiday traybake has been a centerpiece of my December baking for years: soft, buttery cookie bars loaded with chocolate chips and festive red, green, and white M&Ms. I first created this version during a chaotic December when I needed a crowd-pleasing treat that traveled well and didn’t require decorating individual cookies. The result was exactly what I wanted — the tender chew of a perfectly baked cookie, the snap of candy-coated chocolate, and a glossy top dotted with bright holiday colors. Every year neighbors and friends ask when I’ll be bringing these to the cookie swap, and the recipe has become my go-to for school parties and office treats.
What makes these bars special is how forgiving they are: the batter is easy to mix by hand or with a mixer, and the pan method means uniform slices and consistent baking. The combination of granulated and brown sugar gives depth of flavor and chew, while a modest amount of butter keeps them rich without being greasy. The final touch of extra candies pressed on top before baking creates an irresistible, professional-looking finish. Make them ahead, slice them into neat squares, and watch how quickly they disappear at any holiday gathering.
I remember bringing a pan to a holiday open house and watching people come back for seconds — the bright candies made the tray stand out, and neighbors asked for the recipe immediately. Baking these became a small tradition: I make one batch for home and one to drop on my mother-in-law’s doorstep, wrapped in parchment and ribbon.
My favorite aspect is how quickly this recipe brings people together — kids love the colors and adults appreciate the perfect balance of chew and chocolate. Once, I packed a tin to a potluck and was asked for the recipe three times that night; the bars were gone before dessert was officially served. These moments are what make holiday baking so rewarding.
Store cooled bars in an airtight container layered with parchment to prevent sticking. At room temperature they keep well for 48 hours; for longer storage refrigerate up to 5 days. For freezing, tightly wrap the cooled pan-cut bars in plastic wrap and then foil, or place in a single layer in a freezer container for up to 3 months. Thaw overnight in the refrigerator or at room temperature for a few hours. To refresh slightly stale bars, warm in a 300°F oven for 5–7 minutes — the candies will regain a slight sheen.
If you need to swap ingredients, use the following ratios and expect slight texture changes: replace half the butter with vegetable shortening for a slightly more cake-like texture; swap up to 1/2 cup of all-purpose flour with almond flour for nutty depth (note: this will affect structure); use gluten-free 1-to-1 flour blend if avoiding gluten but do not expect identical chew; and substitute equal amounts of white chocolate chips or peanut butter chips for chocolate chips for flavor variety. For egg-free, use 2 commercial egg replacers or 1/2 cup unsweetened applesauce plus 1 tablespoon ground flax mixed with 3 tablespoons water, though texture will be denser.
Serve slices on a festive platter lined with parchment and garnished with a few extra candies and a sprig of rosemary for holiday contrast. Pair with hot cocoa, mulled cider, or coffee for an afternoon treat. For gift boxes, layer bars between wax paper and tie with ribbon. Cut bars into smaller squares for cookie exchanges or into larger rectangles for portable lunchbox treats. They also make a cheerful addition to dessert tables alongside shortbread and peppermint bark.
While candy-studded cookie bars don’t have a single origin story, they reflect a long-standing American tradition of pan-baked sweets that prioritize convenience and shareability at communal gatherings. The M&M candy itself debuted in the 1940s and quickly became a popular mix-in for baking in later decades. Combining cookie dough with colorful candies became especially popular during holiday seasons when bright, festive colors are desired. These bars are a modern holiday adaptation of classic chocolate chip cookie flavors presented in a form that’s easy to portion and transport.
Adapt these bars for seasons and celebrations by switching the candy colors and mix-ins: autumn harvest bars with orange and brown candies plus chopped toasted pecans; Valentine’s Day bars with pink and red candies and white chocolate chips; or patriotic summer bars using red, white, and blue candies. Incorporate seasonal spices — a pinch of ground ginger and cinnamon for winter warmth or citrus zest and chopped dried cranberries for a bright, festive twist.
For make-ahead convenience, bake and cool the entire pan, then slice and store individual portions in small containers or freezer bags. Label with date and contents. When packing lunches, place a bar in a small resealable bag with a piece of parchment to prevent sticking. If preparing for a large event, scale the recipe and bake in multiple pans, or double the batter and bake in two pans simultaneously if your oven allows. Keep presentation simple by stacking squares and tying with twine for easy gifting.
These Christmas M&M cookie bars are an effortless, joyful addition to any holiday spread. They bake quickly, travel well, and bring a smile to faces of all ages — try a batch this season and make it your new tradition.
Press a few reserved candies on top of the batter before baking for a glossy, attractive finish.
Bring eggs and butter to room temperature for better emulsion and even baking.
Rotate the pan halfway through baking to promote even browning and check at 18 minutes to avoid overbaking.
This nourishing christmas m&m cookie bars recipe is sure to be a staple in your kitchen. Enjoy every moist, high protein slice — it is perfect for breakfast or as a wholesome snack any time.
Yes — store cooled bars in an airtight container at room temperature for up to 48 hours, refrigerated up to 5 days, or frozen for 3 months.
Chill the baked pan briefly for cleaner slices, or warm briefly if you prefer a softer, just-baked texture.
This Christmas M&M Cookie Bars recipe makes perfectly juicy, tender, and flavorful steak every time! Serve with potatoes and a side salad for an unforgettable dinner in under 30 minutes.
Preheat oven to 350°F. Line a 9x13-inch pan with parchment paper or grease lightly. Prepare for easy removal by leaving an overhang.
Beat 1 cup softened butter with 1 cup granulated sugar and 1 cup packed brown sugar until light and fluffy, about 2–3 minutes. Scrape bowl to ensure even mixing.
Add 2 room-temperature eggs one at a time, then 2 teaspoons vanilla. Mix until smooth and glossy but do not overbeat.
Whisk 2 3/4 cups flour with 1 teaspoon baking soda and 1/2 teaspoon salt. Add to wet ingredients in two batches, mixing on low until just combined.
Fold in 1 cup chocolate chips and 1–1 1/2 cups M&Ms, reserving a few to press on top for decoration.
Spread batter evenly into the prepared pan, press reserved candies on top, and bake 18–22 minutes until center is set with a few moist crumbs.
Cool in pan on a rack for 30 minutes, then lift out using parchment and slice into 24 bars. Chill briefly for cleaner cuts if desired.
Last Step: Please leave a rating and comment letting us know how you liked this recipe! This helps our business to thrive and continue providing free, high-quality recipes for you.
Leave a comment & rating below or tag
@mrsrecipe on social media!

A crispy, tender chicken fried steak with a rich sausage cream gravy — classic comfort food perfect for family dinners and weekend indulgence.

Tall, cloudlike pancakes with a delicate eggy interior and golden exterior, perfect for a celebratory breakfast or a relaxed weekend treat.

Bell peppers filled with a rich, creamy chicken and cheese mixture—simple to assemble, family-friendly, and perfect for weeknight dinners or make-ahead meals.
Leave a comment & rating below or tag @mrsrecipe on social media!
Enjoyed this recipe? Share it with friends and family, and don't forget to leave a review!
This recipe looks amazing! Can't wait to try it.
Comments are stored locally in your browser. Server comments are displayed alongside your local comments.
Quick and easy dinner ideas delivered to your inbox.
