
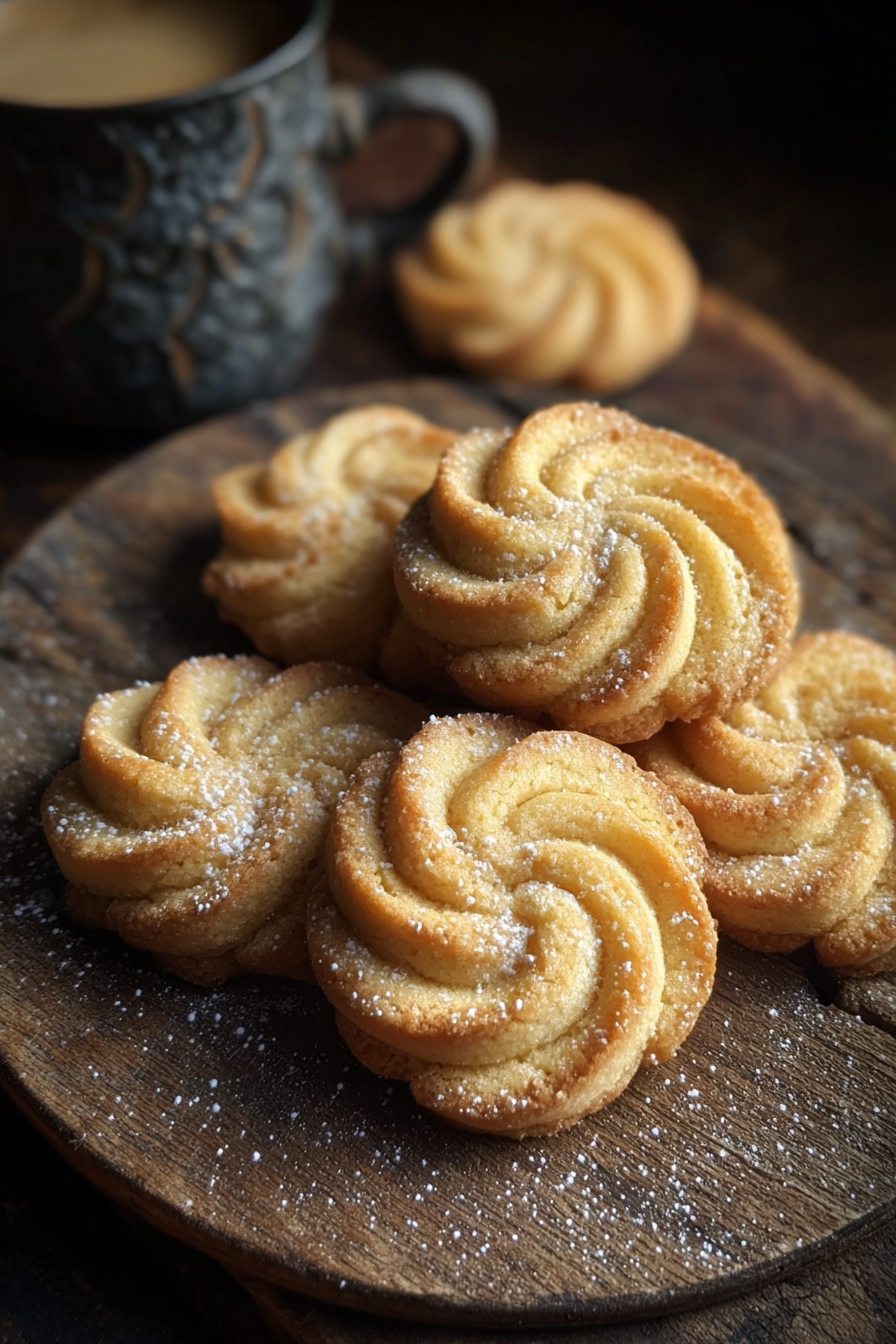
Classic Danish Butter Cookies

Buttery, tender piped cookies with crisp edges and a melt-in-your-mouth center — a timeless treat perfect for gifting, tea, or cozy afternoons.
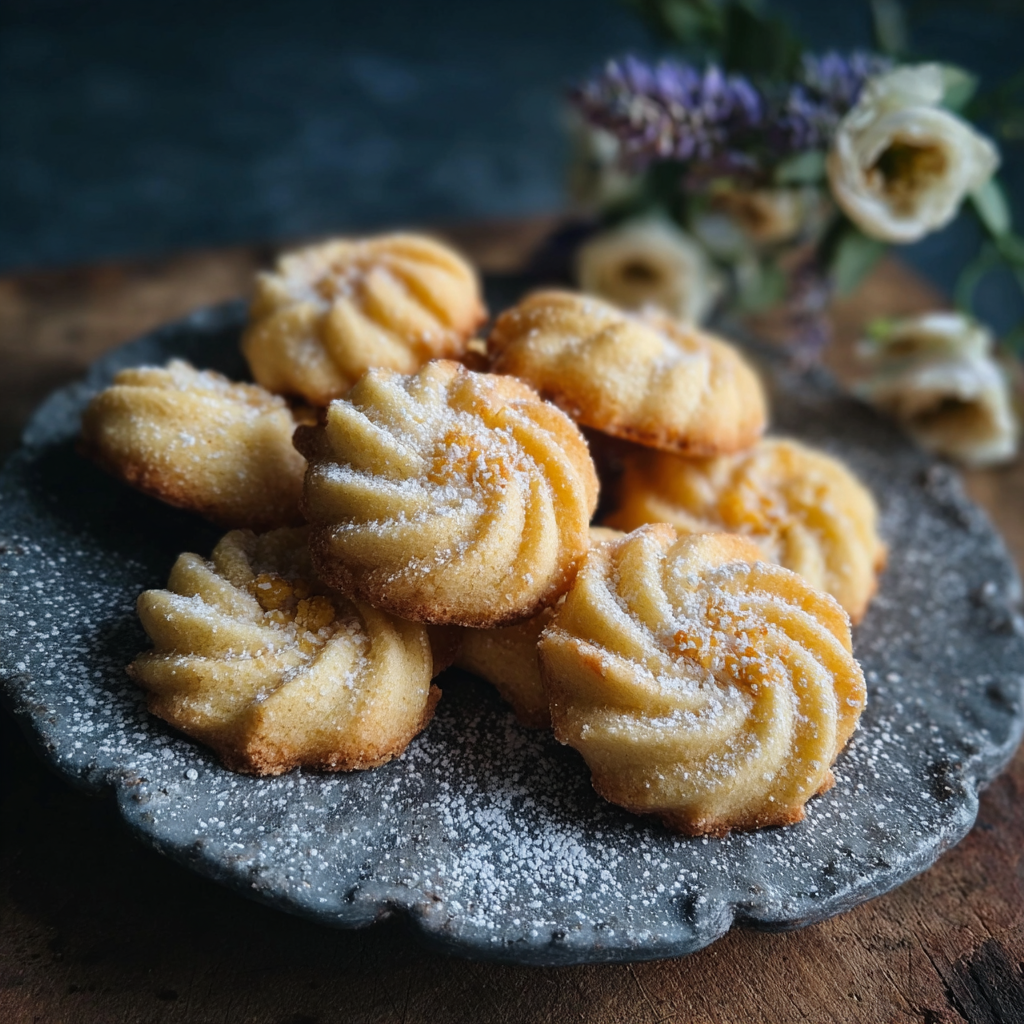
This recipe for Danish butter cookies has been a quiet tradition in my kitchen for years. I first made these on a rainy afternoon when I wanted something simple but special: a cookie that relied on technique rather than a long ingredient list. The dough is rich with unsalted butter and just the right amount of sugar, producing cookies that spread minimally and hold the delicate ridges from a star tip. What makes them stand out is the contrast between the light golden edges and a soft, almost shortbread-like center. Each bite is a buttery, fine-cracked ribbon of flavor that pairs beautifully with coffee or a strong tea.
I discovered this version while trying to recreate a bakery memory from a trip to Copenhagen. Rather than a precise copy, I simplified the method for home baking, focusing on the quality of the butter and the rhythm of piping. These cookies are forgiving: they tolerate slight overworking and still yield a tender crumb if you follow the cues for color and texture. They became my go-to when I needed an elegant cookie for gatherings, and they travel well in tins, which made them perfect for holiday exchanges. Family and friends often comment on the clean butter flavor and the nostalgic shape, which brings a small, celebratory feeling to ordinary days.
Why You'll Love This Recipe
- Simple ingredients: only pantry staples—unsalted butter, sugar, flour, cornstarch, an egg and vanilla—so you can make them any time without a shopping run.
- Quick and accessible: ready in about 30 minutes from start to finish when you pipe straight to the baking sheet; no chilling required for small batches.
- Perfect for gifting: the classic piped shape and light golden edge make attractive bundles in tins or cellophane bags.
- Consistent results: piping with a large star tip gives uniform cookies that bake evenly and hold their shape.
- Versatile: make-ahead dough can be chilled for a day or frozen for up to 3 months for busy bakers.
- Kid-friendly technique: piping teaches control and yields instant rewards — kids love making the rosettes.
Personally, I love how this recipe bridges everyday comfort and a little finesse. My mother used to press these out with a fork, but piping adds a touch of bakery polish that always earns compliments. When I bring a tin to a neighbor or family gathering, the cookies rarely make it past the second round. They’re one of those recipes that remind me of small rituals—preheating the oven, the hum of the mixer, and the quiet satisfaction of a perfect little ridge on each cookie.
Ingredients
- Unsalted butter (1 cup): Use high-quality European-style butter if you can—brands with higher butterfat like Kerrygold or Plugrá add a richer mouthfeel. Soften butter to room temperature but not melty; it should give under gentle pressure to create a creamy, aerated mixture.
- Granulated sugar (3/4 cup): Regular granulated sugar keeps the texture clean and helps achieve a slight crisp at the edge. If you prefer a more caramel note, swap half for superfine or caster sugar for faster creaming.
- Large egg (1): Adds structure and helps bind the dough while keeping the cookies tender. Use a room-temperature egg to promote even mixing.
- All-purpose flour (2 cups): Choose a reliable brand such as King Arthur or Pillsbury; spoon and level the flour to avoid packing and adding too much.
- Vanilla extract (1 teaspoon): Pure vanilla gives depth; if unavailable, high-quality imitation vanilla will still produce a lovely flavor.
- Salt (1/4 teaspoon): Balances sweetness—omit only if using salted butter and adjust to taste.
- Cornstarch (2 tablespoons): Keeps the texture tender and slightly shortbread-like by softening the gluten network.
- Extra sugar for sprinkling (optional): A light dusting of granulated or sanding sugar before baking adds a gentle sparkle and slight crunch.
Instructions
Prepare the oven and sheets: Preheat the oven to 350°F (175°C). Line two baking sheets with parchment paper and arrange racks to allow even airflow. A fully preheated oven is essential so the cookies set immediately and keep their piped detail. If using convection, reduce the temperature by 25°F. Cream butter and sugar: In a large bowl, cream together the softened butter and granulated sugar with an electric mixer on medium speed until the mixture is light and fluffy, about 2–3 minutes. Scrape the bowl occasionally to ensure even aeration. Proper creaming dissolves some sugar and incorporates air, contributing to a tender crumb. Add egg and vanilla: Beat in the egg and vanilla extract until fully incorporated and glossy. The mixture may appear slightly loose—that's fine because the dry ingredients will firm it up. Using a room-temperature egg helps the batter stay emulsified and avoids grainy butter lumps. Combine dry ingredients: Whisk together the flour, cornstarch, and salt in a separate bowl to ensure even distribution. The cornstarch tempers the gluten and gives the finished cookie a delicate, fine texture. Form the dough: Gradually add the dry mix to the wet ingredients on low speed or fold in with a spatula until a smooth, cohesive dough forms. Avoid overmixing once the flour is added; mix just until there are no streaks of flour. Pipe the shapes: Fit a piping bag with a large open star tip and transfer the dough into the bag. Hold the bag vertically about 1/2 inch above the prepared parchment and gently squeeze to pipe 1.5–2 inch rosettes or sticks, spacing them 1.5–2 inches apart. Sprinkle with extra sugar, if desired. Bake and cool: Bake for 12–15 minutes or until the edges are a light golden color. Watch closely in the final minutes; the centers should remain pale. Let the cookies cool on the baking sheet for 5 minutes to firm up, then transfer to a wire rack to cool completely.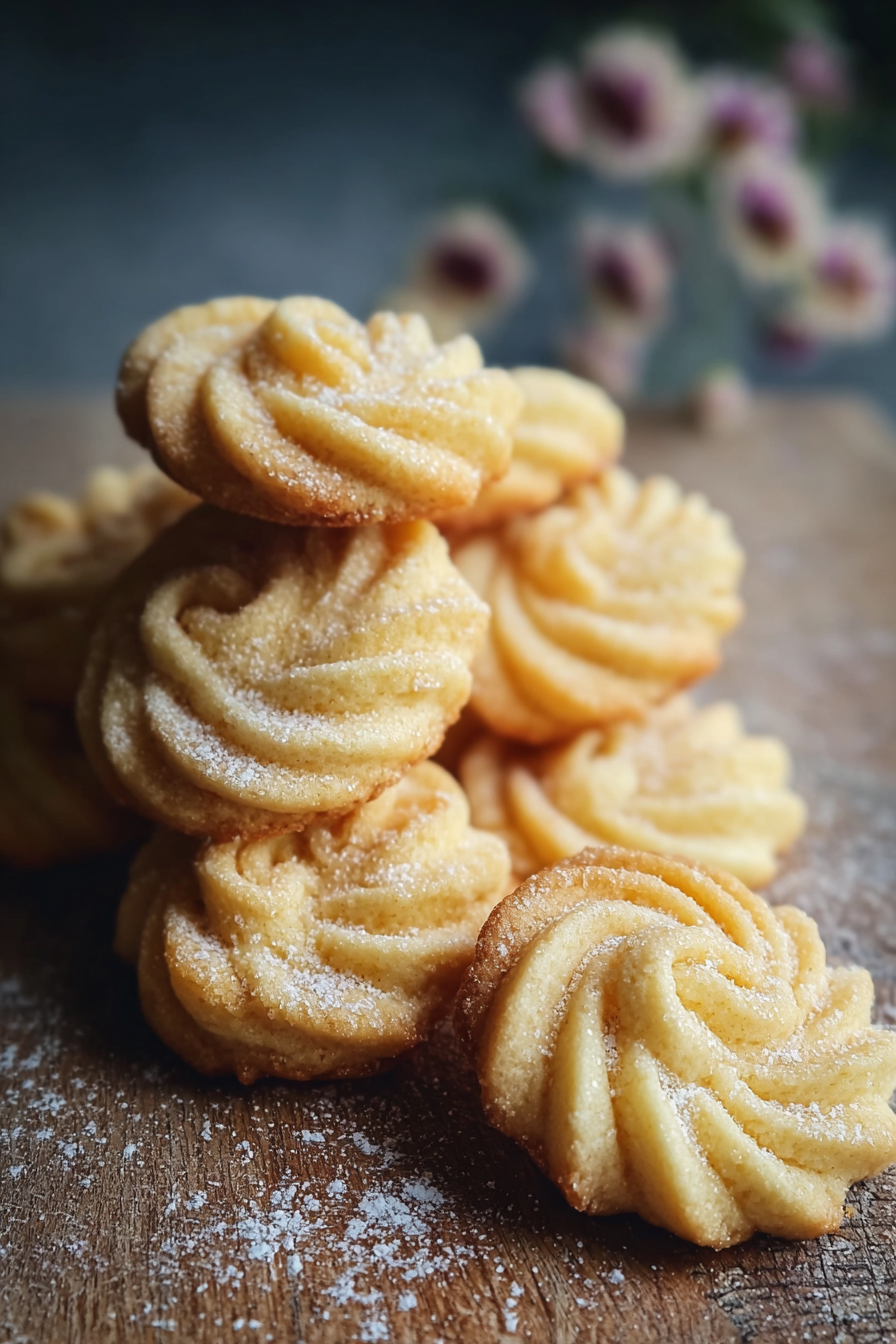
You Must Know
- These cookies keep well at room temperature for up to 5 days in an airtight tin; they maintain their crisp edges and tender centers.
- You can freeze piped dough on the baking sheet, then transfer to a bag for up to 3 months—bake straight from frozen, adding a minute or two to the time.
- High fat content: these are rich in butter, giving about 90 calories per cookie when the batch yields around 36 pieces.
- Textural cue: pull them when edges are faintly golden; if the top is deep gold, they will be crisp rather than tender.
My favorite thing about these cookies is how portable the joy is: I often prepare a big batch and portion them into small tins to hand out as tokens of appreciation. They’re also forgiving for multi-tasking bakers—while piping requires a little focus, the dough’s forgiving nature makes it suitable for beginners and experienced bakers alike.
Storage Tips
Store the cookies at room temperature in an airtight container layered with parchment paper for up to 5 days. For longer storage, freeze completely cooled cookies in a single layer on a baking sheet for an hour, then stack in airtight freezer-safe containers up to 3 months. To refresh slightly softened cookies, warm them in a 300°F oven for 3–4 minutes to restore a delicate crispness. Avoid refrigeration, which can introduce humidity and make the cookies lose their fine texture.
Ingredient Substitutions
If you need to swap ingredients, use 1 cup of salted butter but omit the 1/4 teaspoon of salt in the recipe. For a slightly lighter chew, replace up to half the all-purpose flour with pastry flour. To make them gluten-free, use a 1:1 gluten-free flour blend formulated for baking—expect a slightly different mouthfeel and watch the baking time carefully. For a dairy-free option, use a high-fat vegan butter alternative and note the flavor will shift; egg replacers are possible but may affect structure and color.
Serving Suggestions
Serve these cookies alongside strong coffee, Earl Grey, or a toasted nut milk for contrast. They’re excellent with a smear of jam, a dip in melted dark chocolate, or stacked between layers of whipped cream for a simple dessert. For holiday presentation, arrange in a tin with parchment and a sprig of rosemary for aroma. They also pair nicely with fruit compotes or a small scoop of vanilla ice cream when you want a slightly more indulgent plate.
Cultural Background
These crisp, buttery cookies draw inspiration from classic Danish baking traditions where butter and simple techniques highlight the quality of ingredients. While not traceable to a single historical recipe, the shape and texture align with Northern European shortbread and butter cookie methods that emphasize butterfat and gentle handling. Over time, home bakers and patisseries in Denmark and surrounding regions refined piping techniques and the addition of cornstarch to create the delicate crumb beloved today.
Seasonal Adaptations
In winter, fold in a pinch of ground cardamom or orange zest to complement warm spices. For spring, add a few drops of rosewater and top with pistachio crumbs. During summer, press a small amount of lemon curd into the center of a baked cookie for a tart contrast. These adaptations change the aromatic profile while keeping the essential buttery base intact.
Meal Prep Tips
Make the dough ahead and chill for up to 24 hours to deepen flavor—bring back to room temperature for easier piping. For large batches, pipe multiple trays and freeze them uncooked on a tray before transferring to zip-top bags. Label with the date and bake directly from frozen; add 1–2 minutes to the oven time. Use silicone piping bags for easier cleanup and consistent pressure when producing dozens of cookies.
These cookies are a small measure of joy you can make any afternoon. Whether you’re baking for company or quietly enjoying one with coffee, the simple technique and buttery flavor make them a lasting favorite. I hope you try piping them—the satisfaction of a perfect rosette is worth a little practice.
Pro Tips
Use room-temperature butter and egg for a smooth emulsion and consistent texture.
When piping, hold the bag vertically and apply steady pressure for uniform shapes.
Do not overbake—remove when edges are just turning light golden to keep a tender center.
If the dough feels too soft, chill it briefly for 10–15 minutes to firm up for piping.
This nourishing classic danish butter cookies recipe is sure to be a staple in your kitchen. Enjoy every moist, high protein slice — it is perfect for breakfast or as a wholesome snack any time.
FAQs about Recipes
Can I freeze the piped dough?
Yes. Pipe the dough onto a lined sheet, freeze until solid (about 1 hour), transfer to a freezer bag, and bake from frozen adding 1–2 minutes to the time.
How soft should the butter be?
Room temperature or slightly warm but not melted. Soft but still holding its shape ensures proper creaming and piping.
Tags
Classic Danish Butter Cookies
This Classic Danish Butter Cookies recipe makes perfectly juicy, tender, and flavorful steak every time! Serve with potatoes and a side salad for an unforgettable dinner in under 30 minutes.
Ingredients
Main
Instructions
Preheat and prepare
Preheat oven to 350°F (175°C) and line two baking sheets with parchment paper. Position racks to allow even airflow and ensure a hot oven so cookies set immediately when baked.
Cream butter and sugar
Cream softened butter and granulated sugar on medium speed until light and fluffy, about 2–3 minutes, scraping the bowl to incorporate all butter evenly.
Add egg and vanilla
Beat in the room-temperature egg and vanilla extract until combined and glossy, ensuring the mixture remains emulsified.
Whisk dry ingredients
Whisk together flour, cornstarch, and salt in a separate bowl to distribute the cornstarch and salt evenly for a tender texture.
Combine to dough
Gradually add the dry mix to the wet mixture, mixing on low or folding with a spatula until a smooth dough forms. Avoid overmixing once flour is incorporated.
Pipe cookies
Fill a piping bag fitted with a large star tip and pipe 1.5–2 inch rosettes or shapes onto prepared sheets, spacing 1.5–2 inches apart. Sprinkle sugar if desired.
Bake and cool
Bake for 12–15 minutes until edges are light golden. Cool on the baking sheet for 5 minutes, then transfer to a wire rack to cool completely.
Last Step: Please leave a rating and comment letting us know how you liked this recipe! This helps our business to thrive and continue providing free, high-quality recipes for you.
Nutrition
Did You Make This?
Leave a comment & rating below or tag
@mrsrecipe on social media!
Categories:
You might also like...

Best Chicken Fried Steak
A crispy, tender chicken fried steak with a rich sausage cream gravy — classic comfort food perfect for family dinners and weekend indulgence.

Fluffy Japanese Soufflé Pancakes
Tall, cloudlike pancakes with a delicate eggy interior and golden exterior, perfect for a celebratory breakfast or a relaxed weekend treat.

Creamy Chicken Stuffed Peppers
Bell peppers filled with a rich, creamy chicken and cheese mixture—simple to assemble, family-friendly, and perfect for weeknight dinners or make-ahead meals.
Did You Make This?
Leave a comment & rating below or tag @mrsrecipe on social media!
Rate This Recipe
Share This Recipe
Enjoyed this recipe? Share it with friends and family, and don't forget to leave a review!
Comments (1)
This recipe looks amazing! Can't wait to try it.
Comments are stored locally in your browser. Server comments are displayed alongside your local comments.
Hi, I'm Clara!
What's Popular

Get My 30-Minute Meals email series!
Quick and easy dinner ideas delivered to your inbox.