
Fried Chicken Pot Pie Pockets

Handheld pot pie pockets filled with shredded fried chicken and creamy vegetables — easy to make, freezer-friendly, and perfect for family dinners or portable lunches.

Why You'll Love This Recipe
- Handheld and portable — each pocket is an individual serving that’s easy to pack for lunches or serve at parties.
- Quick to assemble — ready in about 40 minutes from start to finish using leftover or pre-cooked chicken and pantry staples like canned cream of chicken soup.
- Flexible ingredients — works with roasted, rotisserie, or fried chicken and any frozen vegetable mix you have available.
- Freezer-friendly — freeze the filled, unbaked pockets for up to 3 months and bake straight from frozen for an easy meal later.
- Kid-approved comfort — familiar pot pie flavors in a neat, crispy package that children and picky eaters usually love.
- Minimal equipment — no specialized tools required; a round cutter, baking sheet, and fork are all you need.
In my kitchen these pockets became the unofficial snack of every family movie night. My daughter declared them the official “pocket dinner,” and once I started making a double batch and freezing half, they saved us on too many rushed school mornings to count. They’re one of those easy recipes that feels special without extra fuss.
Ingredients
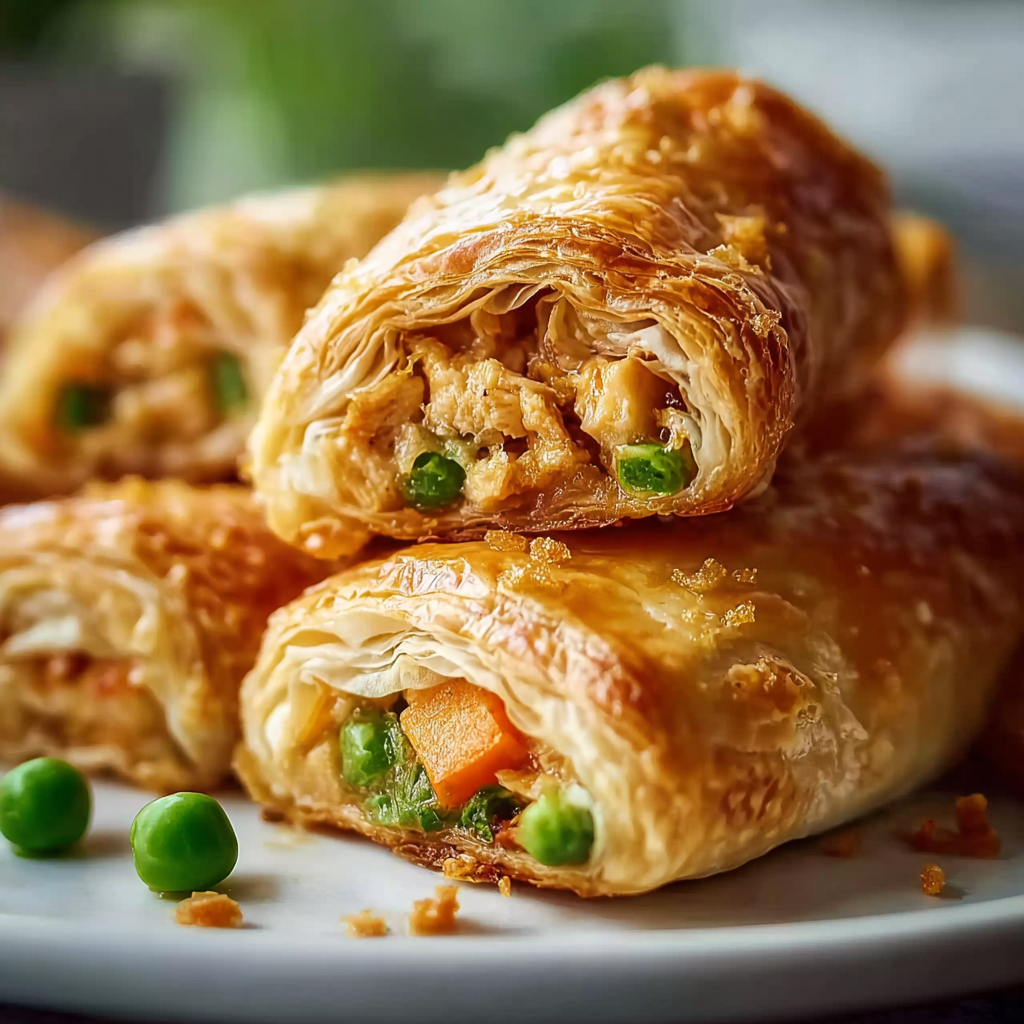
- Cooked fried chicken (2 cups): Shredded meat from about 2 medium chicken breasts or the equivalent in dark meat. Leftover breaded fried chicken works wonderfully because it adds extra savory flavor; remove large dry crumbs so filling stays cohesive.
- Frozen mixed vegetables (1 cup): Peas, carrots, and corn are classic — use a store-brand frozen mix or a higher-quality frozen medley like Birds Eye for consistent texture. Thaw briefly or add frozen straight to the mix if you plan to let the mixture rest before assembly.
- Cream of chicken soup (1/2 cup): One half of a standard 10.5-ounce can works well. For a lighter option, use reduced-sodium or a homemade velouté if you prefer more control over sodium and creaminess.
- Garlic powder and onion powder (1 teaspoon each): These powdered aromatics deepen flavor without added prep; use Morton or McCormick brands for reliable results.
- Salt and pepper: Taste to season; start with 1/4 teaspoon salt and 1/8 teaspoon black pepper then adjust based on how seasoned your leftover chicken is.
- Pre-made pie crusts (1 package, two crusts): Use a refrigerated pie dough like Pillsbury or your favorite made-from-scratch crust rolled and cut to size. Two crusts yield about 8 pockets depending on cutter size.
- Egg (1, beaten): For egg wash; gives a glossy, golden finish. Use one large egg mixed with 1 tablespoon water for an even glaze.
Instructions
Preheat Oven: Set the oven to 400°F (200°C). Line a baking sheet with parchment paper to prevent sticking and to help the bottoms brown evenly. Position a rack in the center of the oven for the best, most even crust color; allow the oven to fully preheat for at least 10 minutes. Prepare Filling: In a large bowl, combine 2 cups shredded fried chicken, 1 cup frozen mixed vegetables (thawed or lightly thawed), 1/2 cup cream of chicken soup, 1 teaspoon garlic powder, 1 teaspoon onion powder, and salt and pepper to taste. Mix gently until everything is evenly coated. The filling should be moist but not soupy — if it seems too wet, add a tablespoon of plain breadcrumbs to absorb excess moisture. Roll Out Dough: Lightly flour a work surface and unroll both pie crusts. Use a 4- to 5-inch round cutter or a large glass to cut circles. Re-roll scraps once or twice to maximize yield. For uniform pockets, aim for circles about 4.5 inches across which yield 8 pockets from two crusts. Fill Pockets: Place about 2 tablespoons of filling in the center of each dough circle, leaving a half-inch border to allow for sealing. Avoid overfilling; too much filling will make sealing and baking messy and increase the chance of rupture. Seal Pockets: Brush the edge of each circle with a little beaten egg or water, fold the dough over to form a half-moon, then press edges firmly together. Crimp edges with a fork to ensure a tight seal and create a decorative edge. Use a small knife to cut two 1/2-inch slits in the top of each pocket to vent steam while baking. Apply Egg Wash & Bake: Place the pockets on the prepared baking sheet. Brush the tops with the beaten egg wash for a glossy golden finish. Bake at 400°F for 20–25 minutes, or until the tops are deep golden brown and the filling is bubbling through the vents. Rotate the pan halfway through baking for even color. Cool & Serve: Allow the pockets to cool on the sheet for 5 minutes before transferring to a wire rack or serving plate. Cooling prevents the filling from scalding and lets the pockets set, making them easier to handle.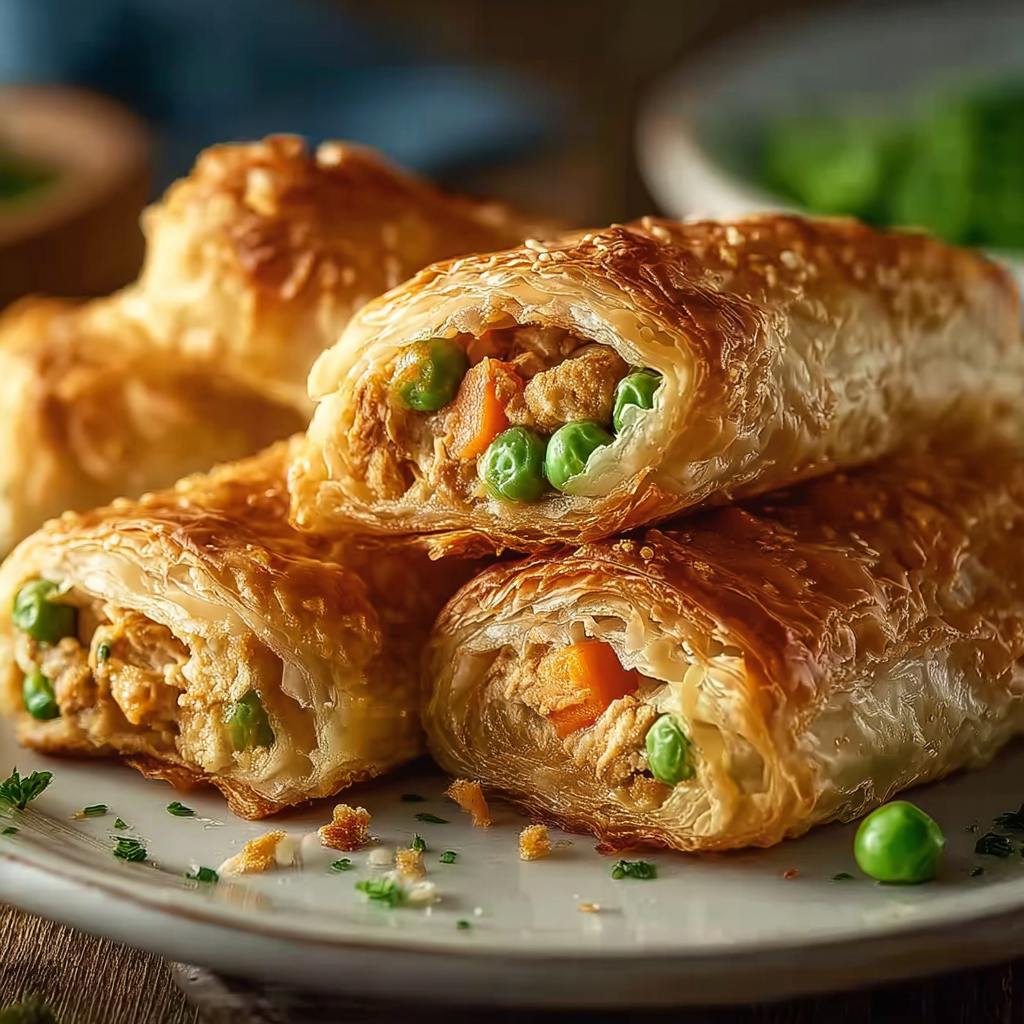
You Must Know
- These pockets freeze well: place unbaked pockets on a parchment-lined tray and freeze until solid, then transfer to a freezer bag for up to 3 months. Bake from frozen, adding 6–8 minutes to the bake time.
- Nutrition note: each pocket is a comfort-dense portion with a balance of protein and carbohydrates; use lower-fat soup or whole-wheat crust for a lighter version.
- Storage: refrigerate leftovers in an airtight container for up to 3 days; reheat in a 350°F oven for 10–12 minutes to restore crispness instead of microwaving which can soften the crust.
- Allergens: contains wheat and egg; cream of chicken soup often contains milk and soy depending on brand — read labels if serving guests with sensitivities.
My favorite part of making these is how customizable they are. Once I experimented by adding a tablespoon of Dijon mustard to the filling and it brightened the whole pocket. Family feedback usually centers on texture — everyone notices and appreciates when the crust is flaky and the filling is creamy but not runny.
Storage Tips
To maintain quality, cool pockets completely before refrigerating. Store in an airtight container layered with parchment paper to avoid soggy bottoms. Refrigerated pockets keep for up to 3 days. For longer storage, freeze on a single layer on a baking sheet until firm, then transfer to a labeled freezer bag for up to 3 months. Reheat from frozen in a preheated 375°F oven for 18–22 minutes or until internal temperature reaches 165°F; this keeps the crust crisp. For reheating refrigerated pockets, 350°F for 10–12 minutes restores the texture best.
Ingredient Substitutions
If you don’t have fried chicken, use shredded rotisserie or roasted chicken — remove excess skin if it creates greasy pockets. Swap cream of chicken soup with cream of mushroom for a deeper flavor or use 1/2 cup of plain Greek yogurt thinned with a tablespoon of milk for a fresher note (add a pinch more salt). For a vegetarian option, replace chicken with 1 cup cooked chickpeas and an extra 1/2 cup mushrooms; adjust seasonings and consider a splash of soy sauce for umami. Gluten-free pie crusts work, but texture will differ slightly and baking times may change.
Serving Suggestions
Serve pockets warm with a crisp green salad dressed in lemon vinaigrette for a balanced meal. They’re great alongside roasted root vegetables for a hearty dinner or with a simple coleslaw and pickles for a picnic. Garnish with chopped parsley or chives for color and freshness. For dipping, offer a side of hot sauce or a tangy mustard-mayo mix to cut through the richness.
Cultural Background
Hand pies are a global comfort food concept, from empanadas in Spain and Latin America to Cornish pasties in England. This version merges classic American pot pie flavors with the portability of a hand pie. Pot pies themselves evolved as a way to use leftover meat and vegetables in a creamy gravy tucked under pastry; turning that into a pocket makes the dish more casual and travel-friendly while keeping those familiar flavors intact.
Seasonal Adaptations
In winter, use root vegetables and add a spoonful of turkey gravy for a holiday-themed pocket. In summer, swap the frozen mixed vegetables for fresh corn kernels, diced zucchini, and bell peppers; reduce baking time slightly if ingredients are very watery. For spring, bright herbs like tarragon or dill added to the filling lift the flavor and pair well with lighter crusts.
Meal Prep Tips
Make a double batch and freeze unbaked pockets on trays for quick future meals. Label freezer bags with the date and reheating instructions. If preparing for lunches, bake fresh pockets on the morning you pack them and store in an insulated lunch container to keep warm. Alternatively, bake from frozen in the office toaster oven for a quick lunch fix.
These Fried Chicken Pot Pie Pockets are a dependable, flexible recipe you can tailor to your pantry and schedule. The combination of flaky pastry and creamy, savory filling makes them a family favorite — once you try them, I expect they’ll become a staple in your meal rotation too.
Pro Tips
If the filling is too wet, stir in 1 tablespoon plain breadcrumbs to thicken before filling the dough circles.
Freeze unbaked pockets on a tray first so they keep their shape, then transfer to a freezer bag for long-term storage.
Brush edges with egg wash and crimp with a fork to ensure a tight seal and prevent leaks during baking.
Rotate the baking sheet halfway through baking for even browning and consistent crispness.
Let pockets rest 5 minutes after baking so the filling sets and you avoid steam burns when eating.
This nourishing fried chicken pot pie pockets recipe is sure to be a staple in your kitchen. Enjoy every moist, high protein slice — it is perfect for breakfast or as a wholesome snack any time.
Tags
Fried Chicken Pot Pie Pockets
This Fried Chicken Pot Pie Pockets recipe makes perfectly juicy, tender, and flavorful steak every time! Serve with potatoes and a side salad for an unforgettable dinner in under 30 minutes.
Ingredients
Filling
Dough & Finish
Instructions
Preheat Oven
Preheat oven to 400°F (200°C) and line a baking sheet with parchment paper. Allow the oven to fully heat for 10 minutes before baking to ensure even browning.
Prepare Filling
In a large bowl, combine 2 cups shredded fried chicken, 1 cup frozen mixed vegetables (thawed or lightly thawed), 1/2 cup cream of chicken soup, 1 tsp garlic powder, 1 tsp onion powder, and salt and pepper to taste. Mix until evenly coated and adjust seasoning; if too wet, add 1 tbsp breadcrumbs.
Roll Out Dough
Lightly flour a work surface and roll out both pie crusts. Cut circles about 4–5 inches in diameter using a round cutter or large glass. Re-roll scraps to get 8 circles total from two crusts.
Fill Pockets
Place about 2 tablespoons of filling in the center of each dough circle, leaving a 1/2-inch border around the edge to allow for sealing.
Seal Pockets
Brush the edge of each circle with a little beaten egg or water, fold into a half-moon, press edges together, then crimp with a fork. Cut two small slits in the top for steam vents.
Apply Egg Wash & Bake
Arrange pockets on the lined baking sheet, brush tops with the beaten egg wash, and bake at 400°F for 20–25 minutes until golden brown and filling bubbles through vents. Rotate the pan halfway through baking for even color.
Cool & Serve
Let pockets cool on the baking sheet for 5 minutes before transferring to a rack or serving plate to allow the filling to set and prevent burns.
Last Step: Please leave a rating and comment letting us know how you liked this recipe! This helps our business to thrive and continue providing free, high-quality recipes for you.
Nutrition
Did You Make This?
Leave a comment & rating below or tag
@mrsrecipe on social media!
Categories:
You might also like...

Best Chicken Fried Steak
A crispy, tender chicken fried steak with a rich sausage cream gravy — classic comfort food perfect for family dinners and weekend indulgence.

Fluffy Japanese Soufflé Pancakes
Tall, cloudlike pancakes with a delicate eggy interior and golden exterior, perfect for a celebratory breakfast or a relaxed weekend treat.

Creamy Chicken Stuffed Peppers
Bell peppers filled with a rich, creamy chicken and cheese mixture—simple to assemble, family-friendly, and perfect for weeknight dinners or make-ahead meals.
Did You Make This?
Leave a comment & rating below or tag @mrsrecipe on social media!
Rate This Recipe
Share This Recipe
Enjoyed this recipe? Share it with friends and family, and don't forget to leave a review!
Comments (1)
This recipe looks amazing! Can't wait to try it.
Comments are stored locally in your browser. Server comments are displayed alongside your local comments.
Hi, I'm Clara!
What's Popular

Get My 30-Minute Meals email series!
Quick and easy dinner ideas delivered to your inbox.