>>
30-MINUTE MEALS! Get the email series now →


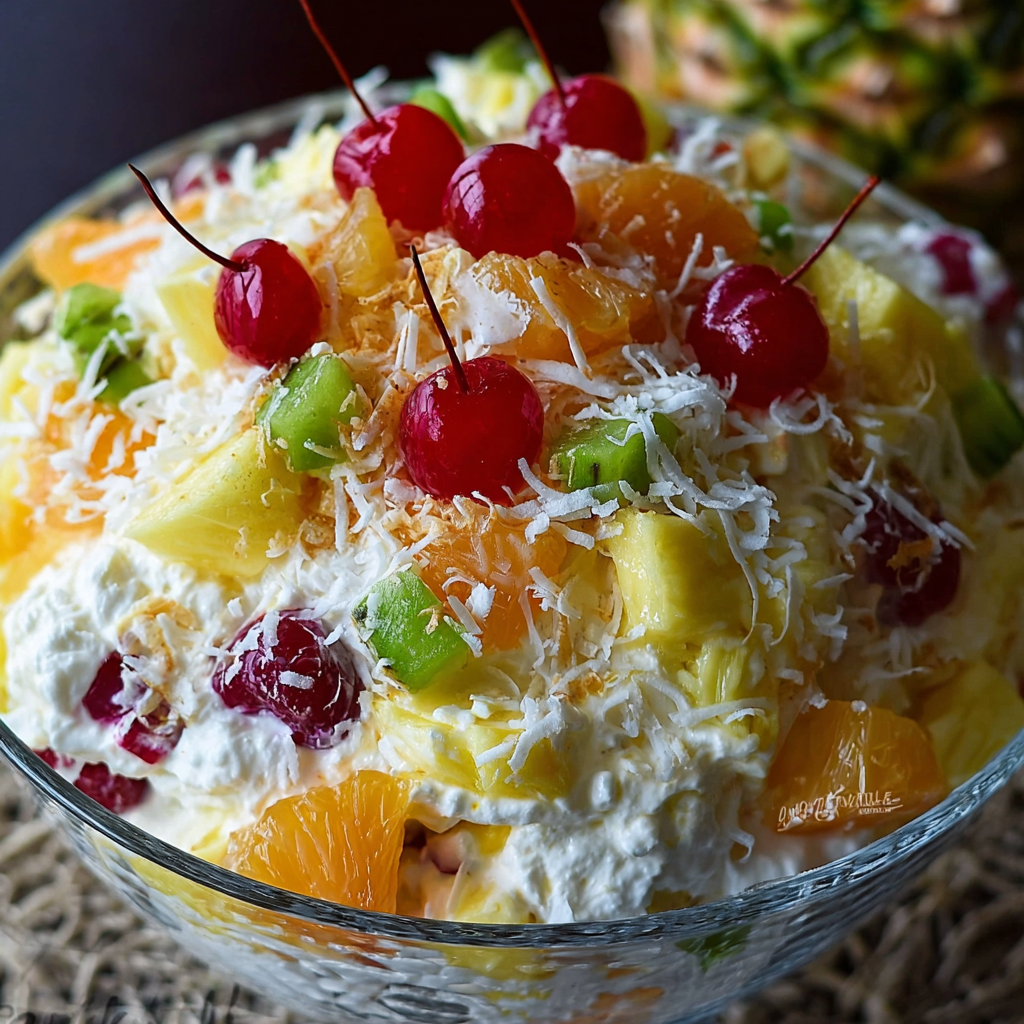
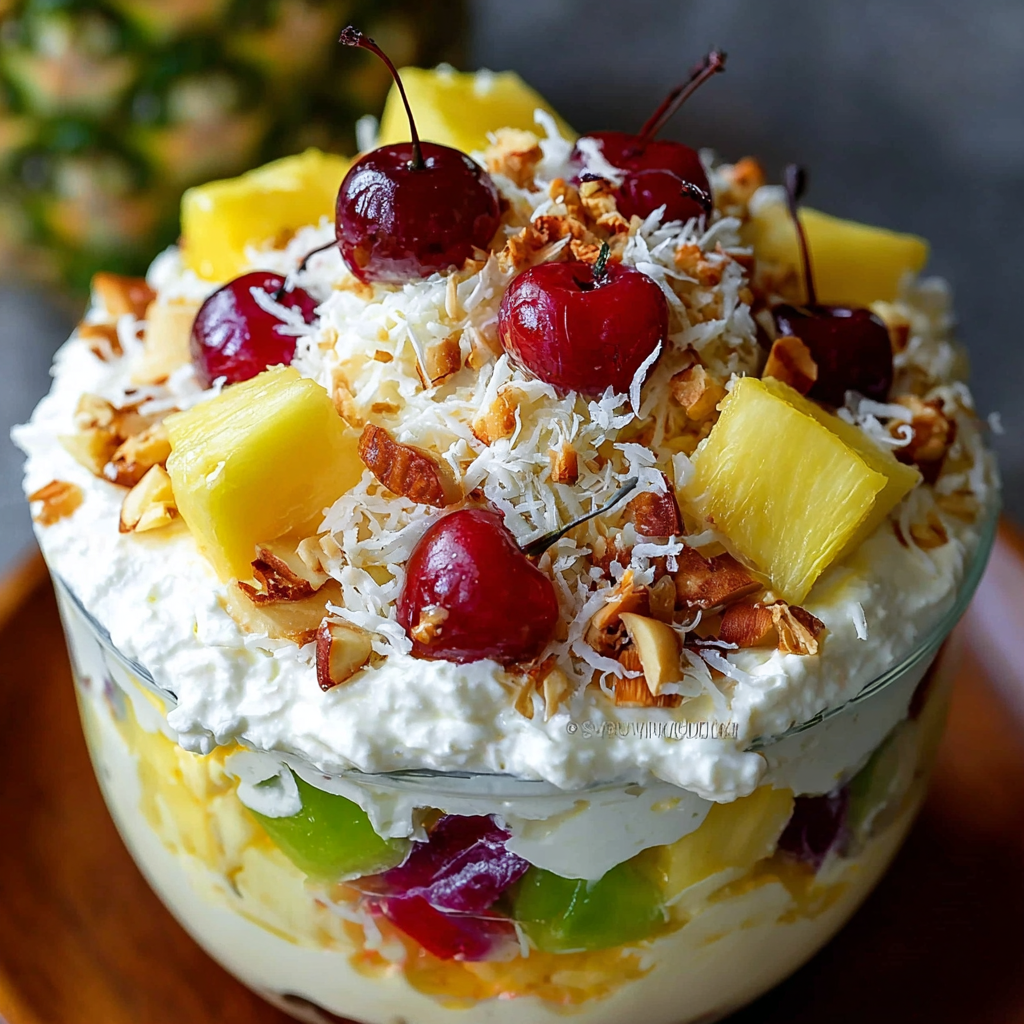
A light, fruity cheesecake-style salad layered with cream cheese, whipped topping, and tropical fruit — a perfect make-ahead dessert or brunch centerpiece.
This Hawaiian cheesecake salad began as a potluck rescue and quickly became a household favorite. I first made it for a summer neighborhood get-together when I had limited oven space and a big bowl of fruit that needed using. The idea of folding a silky cream cheese base into fresh, tropical fruit felt like a cheat code: all the flavor of a no-bake dessert with the brightness of fresh produce. It’s creamy, slightly tangy, and dotted with bursts of strawberry and pineapple that remind me of beach picnics and lazy afternoons.
I love how the texture balances — the cream cheese base is smooth and lush, the whipped topping keeps it airy, and the fruit adds a juicy contrast. Toasted sweetened coconut on top gives a pleasant chew and a whisper of caramelized flavor. We serve it at family gatherings, potlucks, and sometimes for simple weekend brunches when I want something festive without a lot of fuss. It’s forgiving, quick to assemble, and endlessly adaptable depending on what fruit is in season.
Personally, the first time I served this at a family reunion it vanished in minutes. My niece asked for the recipe on the spot, and my father declared it a “summer classic.” That reaction convinced me to refine the fruit ratios and add the toasted coconut finish — a small touch that makes a big difference.
My favorite thing about this dish is how versatile it is: at a Fourth of July picnic I swapped in blueberries and strawberries and it felt patriotic; for a tropical baby shower I added mango and miniature umbrellas. Family and friends often ask how I keep the fruit from watering down the filling — the trick is to dry fruit well and fold gently so juices are absorbed slowly, keeping the texture pleasant.

Store in an airtight container in the refrigerator for up to 3 days; the texture is best the first 48 hours. If making ahead for a party, prep the cream cheese base and toast the coconut the day before, then combine with freshly prepared fruit a few hours before serving. Avoid freezing as whipped topping degrades and fruit becomes watery when thawed. When reheating is mentioned, this is a chilled dish — simply remove from fridge 10 minutes before serving for the best flavor and texture.
For a lighter option use reduced-fat cream cheese and light whipped topping, though texture will be less rich. To make dairy-free, use a dairy-free cream cheese alternative and a plant-based whipped topping — flavor will shift slightly, so add a touch more powdered sugar if needed. Swap any fruit with apricots, cherries, or peaches in season; use canned pineapple drained well if fresh isn’t available. For less sweetness, reduce powdered sugar to 3 tablespoons.
Serve in a glass trifle dish for a pretty layered presentation or in individual cups for portion control at gatherings. Garnish with extra toasted coconut, a sprig of mint, or a dusting of extra powdered sugar. Pair with shortbread cookies, graham crackers, or tropical sorbet to round out the dessert course. It also works as a fruit-forward side for brunch alongside quiches and coffee cakes.
While this dish isn’t a traditional Hawaiian recipe, it draws on tropical flavors associated with the islands — pineapple, coconut, and bright citrus-like kiwi. The concept of combining a sweetened cream base with fruit echoes classic American Jell-O salads and no-bake cheesecake traditions that are popular in potlucks and family gatherings across the U.S. The toasted coconut gives a nod to Hawaiian-inspired ingredients without claiming direct cultural authenticity.
Summer: emphasize berries, mango, and fresh pineapple for vibrant sweetness. Fall: fold in chopped apples or pears and add a pinch of cinnamon for warmth. Winter: use citrus segments and pomegranate arils for bright acidity. For spring celebrations, add edible flowers and strawberries for color. Small technique changes, like macerating berries in a teaspoon of sugar for winter, can boost flavor when fruit is less sweet.
For meal prep, keep the cream cheese base and fruit in separate containers and combine within 24 hours. Toast coconut and store in an airtight jar at room temperature to maintain crunch. Portion into individual containers for grab-and-go desserts; they make elegant lunchbox treats that feel indulgent but fresh. Label containers with a use-by date to ensure freshness.
This Hawaiian cheesecake salad is a celebration of texture and simplicity. Whether you make it for a crowd, a laid-back brunch, or a weeknight treat, it’s a reliable, delicious way to spotlight fresh fruit. Give it a try and make it your own — swap fruits, switch toppings, and enjoy the smiles it brings to the table.
Bring the cream cheese to room temperature for at least 30 minutes before beating to avoid lumps.
Dry fruit thoroughly on paper towels to minimize excess juice that can thin the filling.
Toast the shredded coconut just until golden to add crunch and enhanced flavor without bitterness.
If preparing ahead, combine filling and fruit no more than 24 hours before serving for best texture.
This nourishing hawaiian cheesecake salad recipe is sure to be a staple in your kitchen. Enjoy every moist, high protein slice — it is perfect for breakfast or as a wholesome snack any time.
Yes — the salad keeps best in the refrigerator for up to 3 days. Avoid freezing because the whipped components and fruit will separate upon thawing.
Use room-temperature cream cheese and gently fold in whipped topping to keep the mixture light; overmixing will deflate it.
This Hawaiian Cheesecake Salad recipe makes perfectly juicy, tender, and flavorful steak every time! Serve with potatoes and a side salad for an unforgettable dinner in under 30 minutes.
Place 8 oz softened cream cheese in a mixing bowl and beat on medium speed until smooth and light, about 1–2 minutes. Scrape the bowl to ensure no lumps remain.
Mix in 1/4 cup powdered sugar and 1 teaspoon vanilla extract until glossy and fully incorporated, about 30–45 seconds.
Gently fold in 8 oz thawed whipped topping using a spatula with a cutting-and-folding motion to retain airiness.
Rinse and dry all fruit thoroughly. Hull and halve strawberries, slice kiwi and pineapple into bite-sized pieces, and set aside a few berries for garnish.
Carefully fold the fruit into the cheesecake mixture until evenly coated without crushing delicate berries.
Cover and refrigerate for at least 1 hour to allow flavors to meld and the filling to set slightly. Overnight chilling is acceptable.
Toast 1/2 cup shredded sweetened coconut in a dry skillet over medium heat, stirring constantly until golden, about 2–3 minutes. Cool and sprinkle on top before serving.
Transfer to a serving bowl, garnish with reserved fruit and toasted coconut, and enjoy chilled.
Last Step: Please leave a rating and comment letting us know how you liked this recipe! This helps our business to thrive and continue providing free, high-quality recipes for you.
Leave a comment & rating below or tag
@mrsrecipe on social media!

A crispy, tender chicken fried steak with a rich sausage cream gravy — classic comfort food perfect for family dinners and weekend indulgence.

Tall, cloudlike pancakes with a delicate eggy interior and golden exterior, perfect for a celebratory breakfast or a relaxed weekend treat.

Bell peppers filled with a rich, creamy chicken and cheese mixture—simple to assemble, family-friendly, and perfect for weeknight dinners or make-ahead meals.
Leave a comment & rating below or tag @mrsrecipe on social media!
Enjoyed this recipe? Share it with friends and family, and don't forget to leave a review!
This recipe looks amazing! Can't wait to try it.
Comments are stored locally in your browser. Server comments are displayed alongside your local comments.
Quick and easy dinner ideas delivered to your inbox.
