>>
30-MINUTE MEALS! Get the email series now →


Delicate red velvet cakes sandwiched with a creamy full-fat cream cheese filling, piped into charming heart shapes for a showstopping treat perfect for celebrations and cozy afternoons.
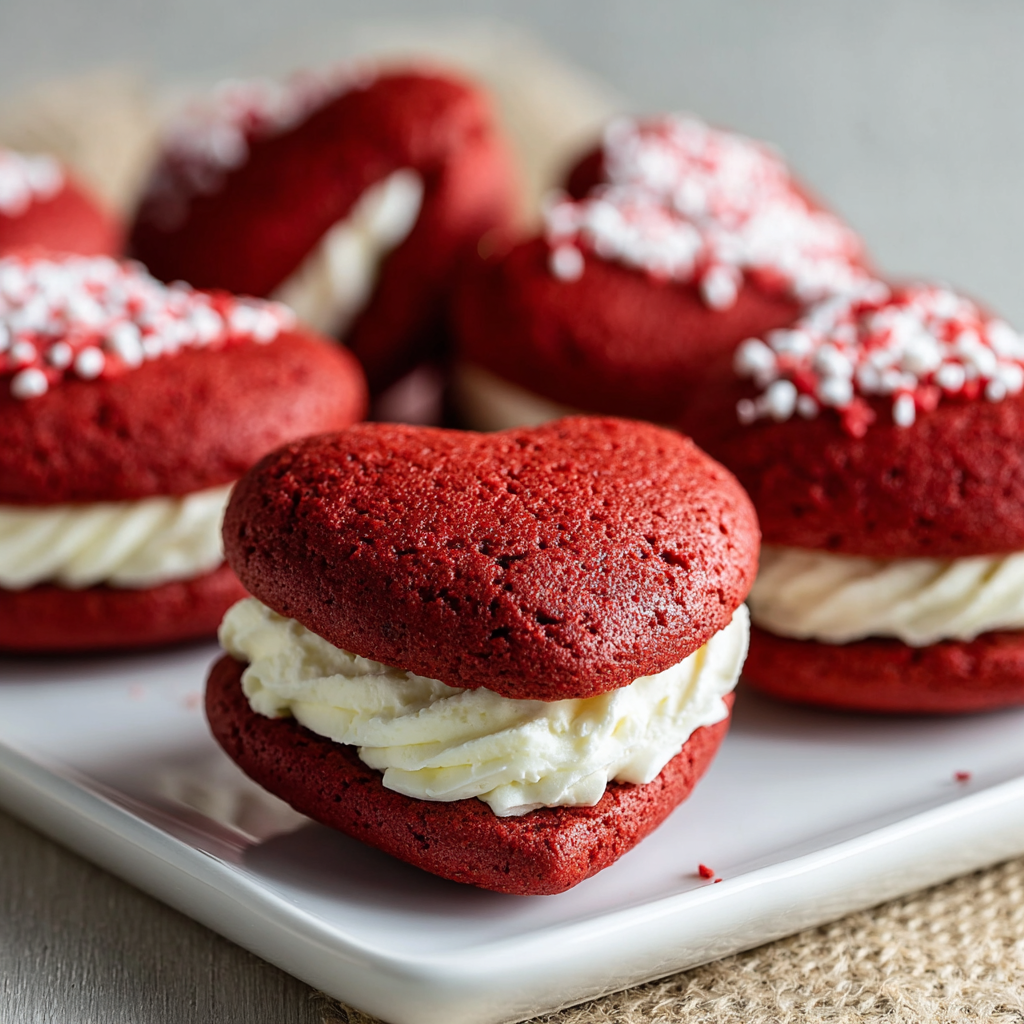
This recipe for heart-shaped red velvet whoopie pies arrived in my life when I wanted something special for a small family celebration. I discovered the combination during a quiet afternoon of baking while testing red velvet variations for Valentine treats. The first batch made everyone pause mid-conversation. The cakes are tender, slightly cakey, and have a gentle cocoa note that balances the tangy, rich cream cheese filling. The heart shape turned what could have been ordinary sandwich cookies into a keepsake for the table.
I remember piping the batter into hearts with my youngest cheering from the counter. The little cakes puff up and hold their shape if you chill the tray briefly and pipe with gentle, even pressure. The filling is indulgent without being overly sweet because the cream cheese brings a subtle tang. These are ideal for gifting, for a dessert plate at a dinner party, or as a whimsical addition to a brunch spread. They stay moist for several days when stored properly, making them a great make-ahead option for busy hosts.
In my experience family members ask for these every year around special days. My niece once took a whole container to school for a bake sale and the box emptied faster than any other item. The recipe has become my go-to when I want something that looks special yet is reliably delicious.
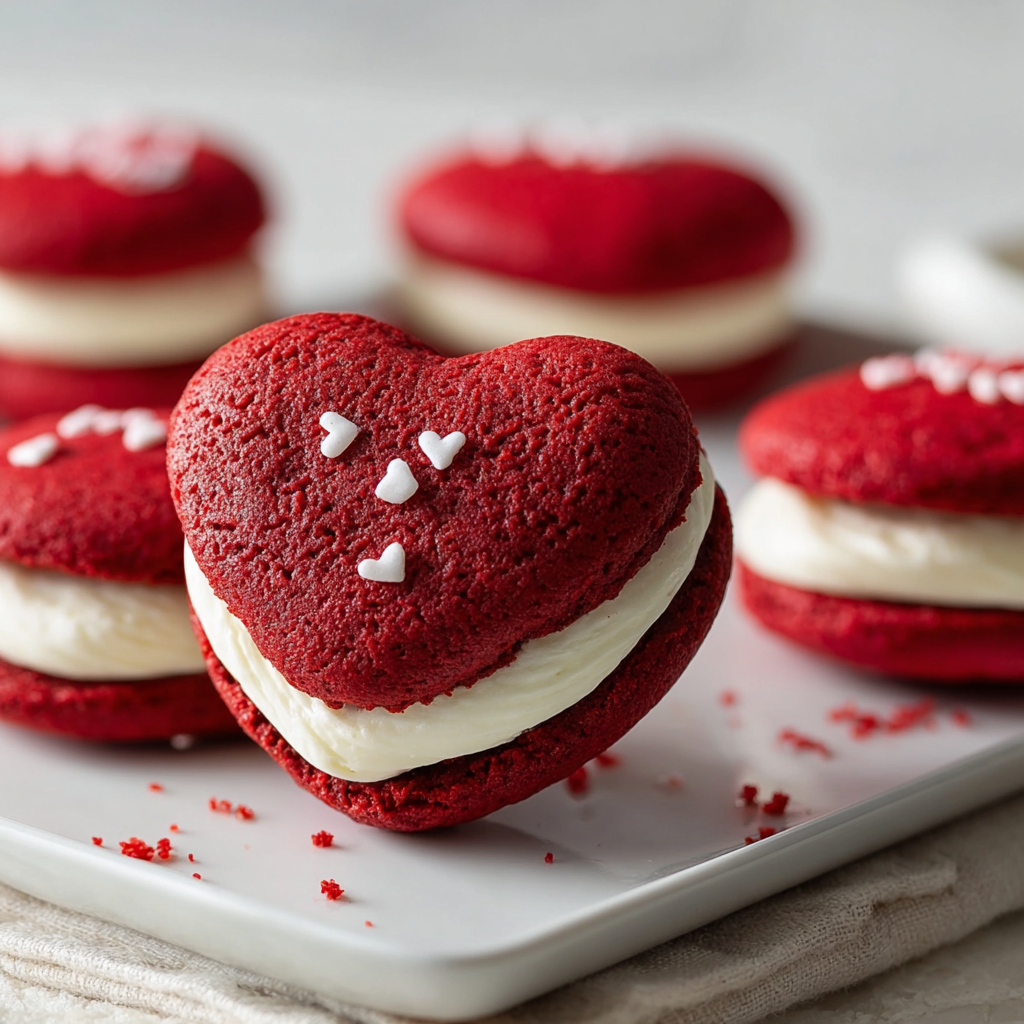
My favorite part about these is how simple decoration can turn them into keepsakes. A light dusting of powdered sugar or a few red sprinkles over the top creates a bakery-worthy finish. On holidays I stack them in a box with parchment and ribbon and they always bring a smile.

Store assembled sandwiches in a single layer in an airtight container in the refrigerator up to 4 days. For longer storage freeze cakes and filling separately. Place parchment between layers and transfer to a freezer-safe bag for up to 3 months. To thaw, move to the refrigerator overnight then assemble and bring to room temperature for 30 minutes before serving. If filling softens during thawing return briefly to the refrigerator to firm up and avoid overly soft centers.
For a dairy-free version substitute butter with plant-based sticks and use a dairy-free cream cheese alternative in the filling. For a lighter filling use 1 cup reduced-fat cream cheese and 1 cup whipped topping folded in for a mousse-like texture. If you do not have buttermilk use 1 cup milk plus 1 tablespoon white vinegar or lemon juice. For natural coloring use beet powder diluted in a little water; expect a more muted hue.
Serve these with a cup of coffee or a glass of cold milk. For a dessert platter pair with chocolate-covered strawberries and shortbread. Garnish with a small fresh raspberry on top of the filling or a sprinkle of cocoa at the edge. For a brunch spread include lemon curd and fresh fruit to cut the richness of the filling.
Red velvet has roots in early American baking and rose to fame in the mid-20th century with variations across regions. The distinct color was originally enhanced by the reaction between natural cocoa and acidic ingredients. Whoopie pies are a New England classic, traditionally made with two cake-like cookies sandwiched around a sweet filling. Combining these two traditions creates a playful, modern treat that pays homage to classic American desserts.
In winter add a pinch of warming spices such as 1/8 teaspoon cinnamon and a dash of nutmeg to the batter. For spring use a citrus-scented filling by folding in 1 teaspoon lemon zest. For holiday versions mix a tablespoon of espresso into the batter for depth or stir 1 teaspoon orange liqueur into the filling for an adult twist.
Make the cakes two days ahead and store in an airtight container at room temperature up to 48 hours if your kitchen is cool. Prepare the filling the day before and keep refrigerated. Assemble on the morning of serving to maintain the freshest texture. If making a large batch, freeze half the cakes unfilled and pull from the freezer the day before you need them.
These heart-shaped red velvet sandwiches are joyful to make and even more joyful to give. With simple techniques and thoughtful storage you can prepare them confidently for any occasion. I hope they bring as much warmth to your table as they have to mine.
Use room temperature ingredients to ensure even mixing and a smooth texture.
Chill piped batter 10 minutes on the tray before baking to help maintain heart shapes.
Sift powdered sugar into the filling to prevent lumps and achieve a silky texture.
If the filling is too stiff add milk 1 teaspoon at a time to reach desired consistency.
To freeze, store cakes and filling separately and assemble after thawing for best texture.
This nourishing heart-shaped red velvet whoopie pies recipe is sure to be a staple in your kitchen. Enjoy every moist, high protein slice — it is perfect for breakfast or as a wholesome snack any time.
This Heart-Shaped Red Velvet Whoopie Pies recipe makes perfectly juicy, tender, and flavorful steak every time! Serve with potatoes and a side salad for an unforgettable dinner in under 30 minutes.
Preheat oven to 350°F and line baking sheets with parchment paper. If you want uniform hearts use a paper template beneath the parchment and flip the parchment sheet so the ink does not contact the batter.
Whisk flour, baking soda, cocoa powder, and salt in a bowl. Sifting is optional but helps aerate the flour for a lighter texture.
Beat softened butter and granulated sugar until pale and fluffy about 3 minutes. This step traps air which helps tenderize the cakes.
Mix in the egg, then add buttermilk, apple cider vinegar, vanilla extract, and red food coloring. Combine on low speed until evenly mixed.
Gradually add the dry mixture to the wet ingredients and mix until just combined. Avoid overmixing to keep the texture tender and cakey.
Fill a piping bag and pipe heart-shaped dollops about 1 1/2 to 2 inches wide. Chill the trays briefly for cleaner edges if desired. Bake 10 to 12 minutes until tops spring back when pressed gently.
Beat cream cheese and softened butter until smooth. Gradually add powdered sugar and vanilla then beat until light and fluffy. Adjust consistency with milk if needed.
Pipe filling onto the flat side of one cake and top with a second cake. Press gently to spread filling to the edges. Chill to set if serving later.
Last Step: Please leave a rating and comment letting us know how you liked this recipe! This helps our business to thrive and continue providing free, high-quality recipes for you.
Leave a comment & rating below or tag
@mrsrecipe on social media!

A crispy, tender chicken fried steak with a rich sausage cream gravy — classic comfort food perfect for family dinners and weekend indulgence.

Tall, cloudlike pancakes with a delicate eggy interior and golden exterior, perfect for a celebratory breakfast or a relaxed weekend treat.

Bell peppers filled with a rich, creamy chicken and cheese mixture—simple to assemble, family-friendly, and perfect for weeknight dinners or make-ahead meals.
Leave a comment & rating below or tag @mrsrecipe on social media!
Enjoyed this recipe? Share it with friends and family, and don't forget to leave a review!
This recipe looks amazing! Can't wait to try it.
Comments are stored locally in your browser. Server comments are displayed alongside your local comments.
Quick and easy dinner ideas delivered to your inbox.
