
Oreo Truffle Balls with Pink Candy Coating

Decadent Oreo truffle balls coated in glossy pink candy melts — a no-bake, crowd-pleasing treat perfect for parties, gifts, and holiday gatherings.
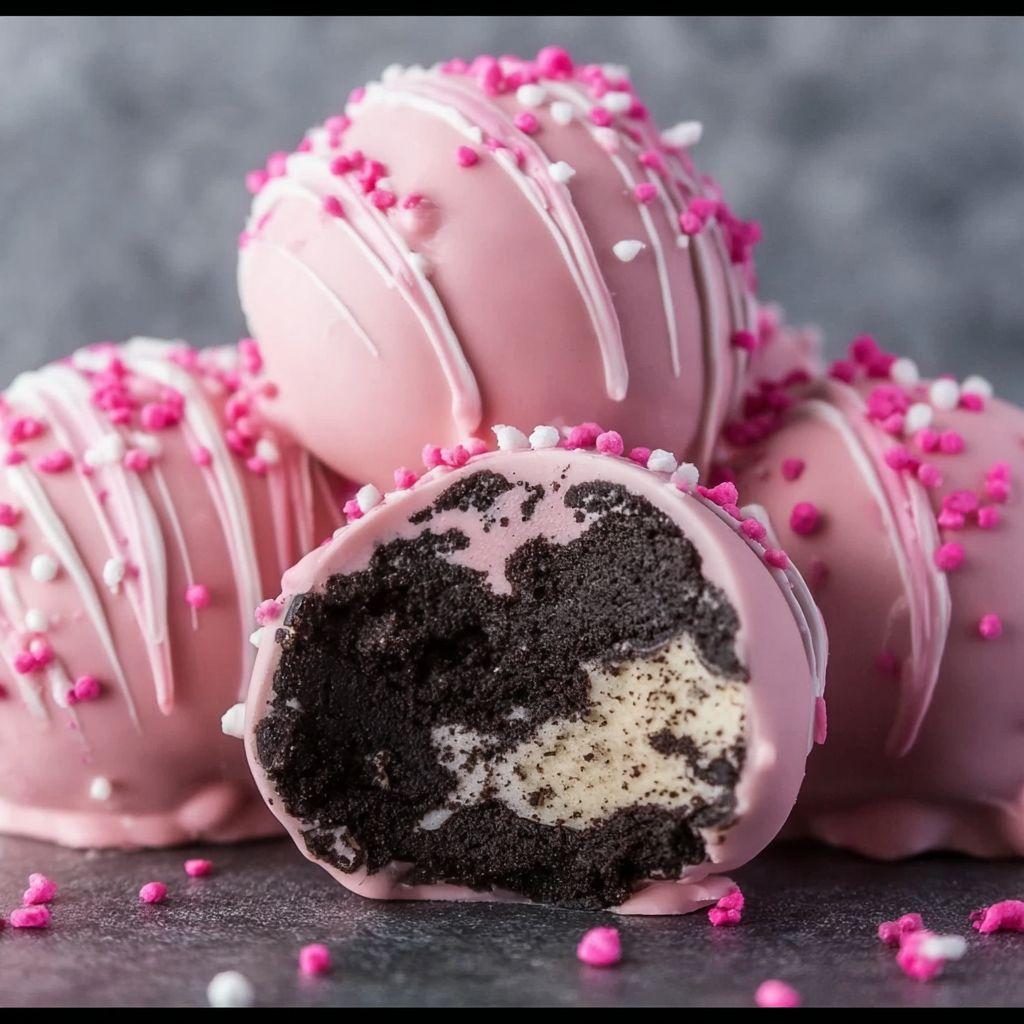
This recipe for Oreo truffle balls with pink candy coating is one I reach for whenever I want to make something pretty, effortless, and universally loved. I first discovered this combination during a Sunday afternoon baking marathon when I wanted to transform simple pantry staples into an elegant party sweet. The result was a tray of bite-sized rounds with a creamy, cookie-studded center and a crisp candy shell that snapped in the best way with every bite. Texture is the star here: the filling is silky and dense from cream cheese and crushed sandwich cookies, while the coating gives a satisfying thin shell and a glossy finish.
What makes this particular version memorable is the pink candy coating — it turns ordinary truffles into festive treats perfect for showers, Valentine’s Day, or any time you want a pop of color. The recipe is forgiving; I often make swaps for dietary needs or whatever I have on hand. Family and friends always ask for the recipe (and a box to take home). These are just as fun to make as they are to eat — a little messy at the dipping stage, but that’s half the joy.
Why You'll Love This Recipe
- Ready in under an hour from start to finish (active time just about 25 minutes) yet impressive enough for parties — perfect for last-minute desserts and gift boxes.
- Uses pantry staples: a package of sandwich cookies and cream cheese are the base, with candy melts for quick assembly and a glossy finish.
- Make-ahead friendly — the centers freeze well before coating, and finished truffles keep in the fridge for days, so you can spread out the work.
- Customizable — swap candy melt colors, use different cookie flavors, or add flavor extracts to the filling for endless variations.
- Kid-friendly assembly — rolling and dipping are great family activities, and the visual payoff is immediate with colorful coating and sprinkles.
Personally, making these always brings back memories of childhood bake sales and neighborhood potlucks. The first time I made them in pink, my niece declared them "fancy cookies," and that label stuck. They never last long at gatherings, and I love watching friends debate which bite reveals more cookie or more cream — it's a small, delicious competition every time.
Ingredients
- Oreos (1 package, 14.3 oz / about 36 cookies): Choose classic sandwich cookies for the most nostalgic flavor. If you prefer chocolate-on-chocolate intensity, try double-stuffed. Crush to fine crumbs for a smooth, uniform filling.
- Cream cheese (8 oz, softened): Full-fat block-style cream cheese gives the richest texture and the best binding. Bring to room temperature for effortless mixing; I avoid spreadable tubs, which are too soft.
- Powdered sugar (1/4 cup, optional): Adds a touch of extra sweetness if you prefer a sweeter filling. Use confectioners’ sugar and sift if clumpy.
- Pink candy melts (2 cups): These provide the smooth, glossy coating. You can choose any brand of candy melts or colored confectionery coating; look for smooth-melting varieties labeled for dipping.
- Coconut oil or vegetable oil (1 tablespoon): Thins the candy melts slightly for a silky coating and helps achieve a thin shell that dries with shine.
- Assorted sprinkles (1/4 cup): Pink, red, and white sprinkles add festive texture and color. Use nonpareils or jimmies according to preference.
Instructions
Prepare the Oreo mixture: Place the Oreo cookies (fillings included) into a food processor and pulse until very fine crumbs form. If you don’t have a processor, seal cookies in a heavy-duty zip-top bag and crush with a rolling pin until finely ground. Transfer crumbs to a large bowl, add softened cream cheese, and mix with a spatula or clean hands until fully combined into a cohesive, slightly sticky dough. If you like sweeter centers, fold in 1/4 cup powdered sugar. The mixture should hold together when pinched. Shape into balls: Line a baking sheet with parchment. Using a teaspoon or a small cookie scoop, portion the mixture and roll between your palms into 1-inch balls (about the size of a large marble). Aim for uniform size so coating sets evenly. Place balls on the parchment sheet spaced an inch apart. Chill in the freezer for 20–30 minutes until firm; this prevents the centers from warming and cracking the coating when dipped. Melt the coating: In a microwave-safe bowl combine the candy melts and 1 tablespoon coconut or vegetable oil. Microwave in 30-second bursts, stirring thoroughly between each burst, until glossy and fully melted. Avoid overheating — the coating should be warm and pourable, not scalding. If too thick, add a few drops more oil and stir until smooth. Dip each truffle: Working quickly, remove the truffles from the freezer. Using a fork or dipping tool, lower a ball into the melted coating and rotate to cover. Lift and tap the fork against the bowl to remove excess coating. Return to the parchment-lined sheet. While the coating is still wet, scatter sprinkles over each truffle. If the coating firms up, warm briefly in the microwave, stir, and continue. Set the coating: After all truffles are dipped, place the sheet in the refrigerator for 10–15 minutes to allow the coating to fully set. Once firm, the candy shell should have a smooth, glossy finish and a slight snap when bitten. Store chilled or at cool room temperature if serving immediately.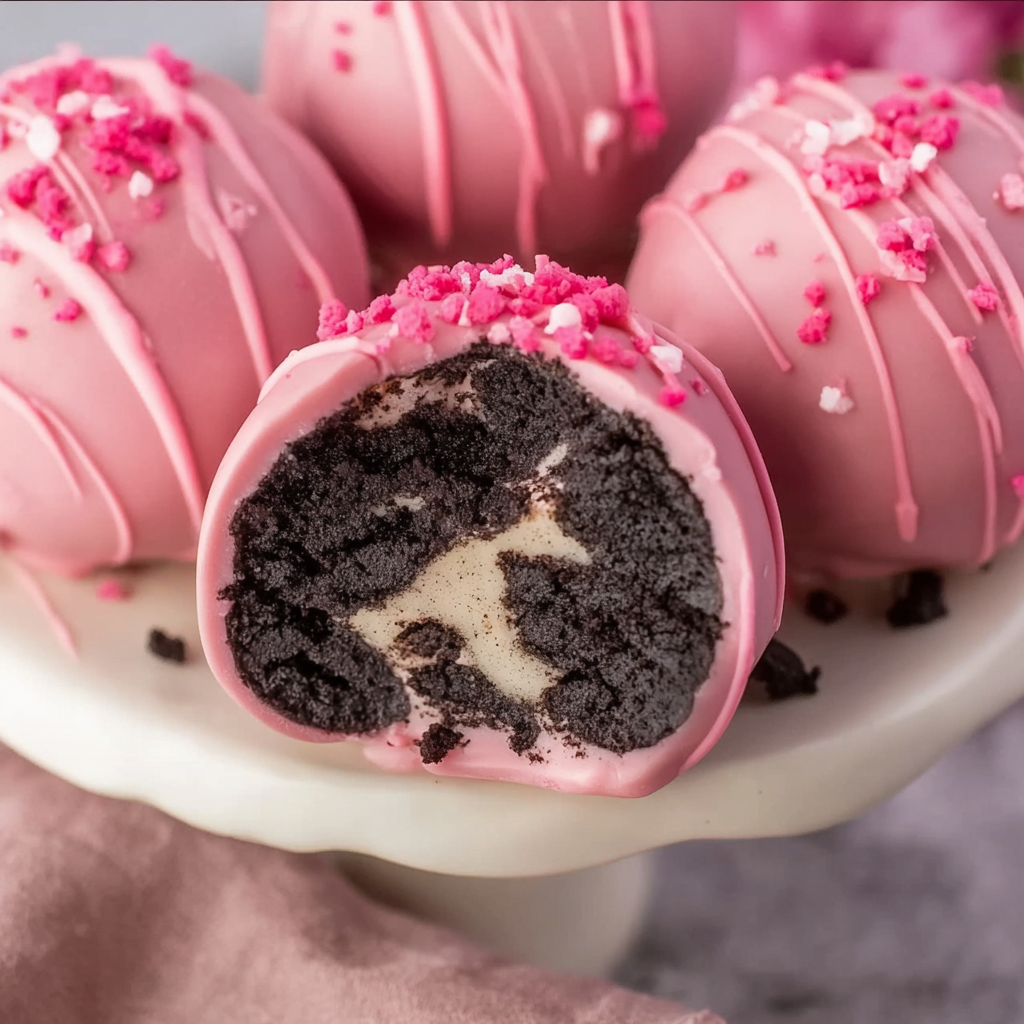
You Must Know
- These keep well refrigerated for up to 10 days and freeze for up to 3 months; thaw in the fridge overnight before serving.
- The recipe yields roughly 30–36 truffles depending on how large you roll them — one 14.3 oz package of cookies + 8 oz cream cheese makes about three dozen 1-inch balls.
- Use block cream cheese, not spreadable tubs, to ensure proper texture and binding of the filling.
- Candy melts vary by brand; add oil sparingly to thin — too much will make the coating soft. If the coating thickens while dipping, warm in 10-second bursts and stir.
My favorite part is the assembly line: one person rolls centers, another dips, and a third sprinkles — it’s a communal activity that turns dessert-making into a memory. The visual contrast between the dark cookie interior and the shiny pink exterior always surprises guests and makes for great party photos.
Storage Tips
Store finished truffles in an airtight container layered with parchment to prevent sticking. Refrigerate for up to 10 days; the candy shell will remain crisp and the inside creamy. For longer storage, freeze in a single layer until firm, then transfer to a freezer-safe container for up to 3 months. To thaw, move to the refrigerator for several hours or overnight to reduce condensation on the candy shell. Avoid leaving them at warm room temperatures for extended periods, as the coating may soften and the centers will become too tender.

Ingredient Substitutions
If you need dairy-free options, use vegan cream cheese and choose dairy-free candy coating or tempered chocolate. For gluten-free needs, buy gluten-free sandwich cookies and verify candy melts are gluten-free. Skip the powdered sugar if you prefer a less sweet center, or replace it with 2 tablespoons of maple syrup for a different flavor profile (note moisture change). Swap coconut oil for vegetable oil if desired — they behave similarly when thinning melts. For an adult twist, stir 1 teaspoon of liqueur (such as Kahlúa or Frangelico) into the filling, but use sparingly to prevent softening.
Serving Suggestions
Serve truffles on a decorative platter or in small paper liners for an elegant display. They pair beautifully with coffee, champagne, or milk and are perfect as bite-sized desserts after a heavy meal. For gifting, arrange in a box lined with tissue and include a small cooling pack if shipping. Garnish with edible gold leaf for formal events or add crushed freeze-dried raspberries to the topping for a tart counterpoint to the sweet shell.
Cultural Background
Chocolate-covered truffle-style confections have European roots in ganache and chocolate truffles, but this American adaptation — blending sandwich cookies with cream cheese and coating in colored candy melts — emerged from home bakers’ creativity. It’s a modern, no-bake take that borrows textures from classic chocolate truffles and the convenience of convenience confections. Over the years, these cookie-based truffles have become staples at bake sales and holiday tables across the United States because they’re accessible, quick, and visually adaptable.
Seasonal Adaptations
Change the coating color and sprinkles to suit seasons and holidays: pastel colors for spring showers, red and green for winter holidays, or orange tones for fall gatherings. Swap in peppermint candy melts and crushed candy cane for a seasonal holiday version, or use orange melts and toasted coconut for autumn. In summer, try white chocolate coating with a dusting of freeze-dried berry powder for a bright, fresh flavor.
Meal Prep Tips
Make the centers up to two weeks in advance and freeze uncoated until ready to assemble; this halves party-day work and keeps dipping neat. Portion the dough using a small scoop, freeze on a tray, then transfer to a container. When you’re ready to coat, thaw briefly in the refrigerator until fork-friendly. Work in small batches while dipping so the coating stays fluid and glossy. Keep spare candy melts warmed gently on a bain-marie or short microwave bursts to maintain working temperature.
These truffles are a joyful blend of simplicity and showmanship — easy enough for a weekday treat, special enough for celebrations. Make a batch, experiment with colors and flavors, and most of all, have fun sharing them.
Pro Tips
Chill the rolled centers before dipping to prevent cracking and maintain shape.
Work in small batches when dipping so the coating stays warm and smooth.
Use a fork lift-and-tap method to remove excess coating and create a clean finish.
Line containers with parchment when storing to prevent sticking and preserve the glossy shell.
This nourishing oreo truffle balls with pink candy coating recipe is sure to be a staple in your kitchen. Enjoy every moist, high protein slice — it is perfect for breakfast or as a wholesome snack any time.
FAQs about Recipes
Can I freeze the truffle centers?
Yes. Freeze uncoated truffle centers on a baking sheet until firm, then transfer to a freezer container. Coat from frozen, adding a minute or two to set time.
What type of cream cheese should I use?
Use full-fat block cream cheese at room temperature for the best texture. Low-fat versions can make the filling less stable.
How do I thin candy melts if they harden during dipping?
If the candy melts get too thick, warm for 10 seconds in the microwave and stir. Add a small amount of oil (a teaspoon at a time) to reach desired consistency.
Tags
Oreo Truffle Balls with Pink Candy Coating
This Oreo Truffle Balls with Pink Candy Coating recipe makes perfectly juicy, tender, and flavorful steak every time! Serve with potatoes and a side salad for an unforgettable dinner in under 30 minutes.
Ingredients
Filling
Coating
Decoration
Instructions
Prepare the Oreo truffle mixture
Pulse Oreo cookies in a food processor until fine crumbs form, or crush in a zip-top bag with a rolling pin. Combine crumbs and softened cream cheese in a bowl and mix until a cohesive, slightly sticky dough forms. Add powdered sugar if desired for extra sweetness.
Portion and chill
Line a baking sheet with parchment and roll the mixture into 1-inch balls. Place balls on the sheet and freeze for 20–30 minutes until firm — this prevents them from falling apart when dipped.
Melt the coating
In a microwave-safe bowl, combine candy melts and coconut or vegetable oil. Microwave in 30-second intervals, stirring between bursts, until smooth and glossy. Keep warm but not hot for dipping.
Dip and decorate
Use a fork or dipping tool to submerge each chilled truffle in the melted coating, lift and tap to remove excess, then place on parchment. Immediately add sprinkles while coating is wet.
Set the coating
Transfer the dipped truffles to the refrigerator for 10–15 minutes until the coating is firm and glossy. Store chilled until serving.
Last Step: Please leave a rating and comment letting us know how you liked this recipe! This helps our business to thrive and continue providing free, high-quality recipes for you.
Nutrition
Did You Make This?
Leave a comment & rating below or tag
@mrsrecipe on social media!
Categories:
You might also like...

Best Chicken Fried Steak
A crispy, tender chicken fried steak with a rich sausage cream gravy — classic comfort food perfect for family dinners and weekend indulgence.

Fluffy Japanese Soufflé Pancakes
Tall, cloudlike pancakes with a delicate eggy interior and golden exterior, perfect for a celebratory breakfast or a relaxed weekend treat.

Creamy Chicken Stuffed Peppers
Bell peppers filled with a rich, creamy chicken and cheese mixture—simple to assemble, family-friendly, and perfect for weeknight dinners or make-ahead meals.
Did You Make This?
Leave a comment & rating below or tag @mrsrecipe on social media!
Rate This Recipe
Share This Recipe
Enjoyed this recipe? Share it with friends and family, and don't forget to leave a review!
Comments (1)
This recipe looks amazing! Can't wait to try it.
Comments are stored locally in your browser. Server comments are displayed alongside your local comments.
Hi, I'm Clara!
What's Popular

Get My 30-Minute Meals email series!
Quick and easy dinner ideas delivered to your inbox.